Are you wondering how you can cloak your affiliate links for your WordPress website?
If you’re using affiliate links on your website, then it’s a good idea to start cloaking them.
Cloaking a link consists of taking that original, messy affiliate link and making it shorter and cleaner.
This can make these links appear more trustworthy and better encourages your visitors to click them.
When it comes to SEO, link cloaking offers some benefits worth mentioning.
Today I’ll show you several easy ways to cloak your affiliate links.
Additionally, I’ll show you some other cloaking features that might help to further improve your affiliate link earnings.
Why You Should Cloak Your Affiliate Links
Here are a few important reasons why you might want to cloak your affiliate links:
1. SEO Benefits
Affiliate links aren’t the kind of high-quality links you’d normally link out to, such as internal linking to other articles on your site or externally to authoritative, informative websites/posts.
Rather, affiliate links are ads. And it’s better to not spread your Page Rank to (or sometimes even associate with) these sites.
The solution is to append rel=”nofollow” to your affiliate links, which instructs search engines to not associate your site with, or crawl the linked page from, your site.
You can apply nofollow manually, but this requires that you do it for every individual affiliate link.
However, with affiliate link cloaking, nofollow can be applied automatically, by default, to every affiliate link.
2. Saves a Ton of Time
Your unique affiliate links can sometimes become dead links over time, no longer working properly and tying you to that commission.
For example, companies can change affiliate platforms or remove certain offers or features, requiring you to generate new affiliate links.
You might also desire to change your affiliate links yourself for whatever reason; perhaps to try out different offers/products from the same or a similar company.
Normally, you’d have to manually go through your website and change these affiliate links one at a time.
With link cloaking, all of the same affiliate links can be updated/changed simultaneously all at once.
Additionally, all of your affiliate links are centralized in one location, which makes changing different links across your website much faster.
3. Shorter and Cleaner URLs
Affiliate links usually look really messy.
Instead of your usual linking structure of “website.com/blue-widgets/”, affiliate links are often very long and make use of a messy assortment of letters and numbers.
Even shortened affiliate links aren’t much better and typically still look spammy; for example, similar to the following:
https://link.me/cv-n/ftz856b5za7
With affiliate link cloaking, you can customize the affiliate link to look however you want (just like how you can with WordPress posts/pages).
You could change that messy link the company gave you to look like this:
https://yourwebsite/your-offer
An even better option is to apply a base slug (such as “/recommends/”) in the URL structure to every affiliate link.
This will prevent conflict with any posts/pages that could share the same name.
With link cloaking, you can have this working automatically, by default, for every affiliate link that you create:
https://yourwebsite/recommends/your-offer
How to Cloak Affiliate Links
The simplest way to cloak affiliate links in WordPress is with a plugin.
In this list, I’ve included some of the best link cloaking plugins.
Apart from cloaking your links, some of these plugins offer other unique features that can help to increase your affiliate earnings.
You can also cloak your links without a plugin, which I will show you how to later in this post.
Cloaking Affiliate Links with ThirstyAffiliates
ThirstyAffiliates is the link cloaking plugin that I’ve decided to use on this website.
It’s one of the best affiliate link manager and link cloaking plugin for WordPress.
Using it, you can easily apply all of the important considerations that I mentioned in the previous section, and then some.

ThirstyAffiliates offers a free and paid plugin.
You can create cloaked links with either, but the paid version comes with some nice features for affiliates marketers.
One prominent feature is “Automatic Keyword Linking”, which allows you to set certain words to automatically become affiliate links.
For example, you could make it so whenever the word “Cooking Course” appears on your site, it will automatically be hyperlinked with the matching affiliate link.
This can be great for adding affiliate links to user-submitted or older content, and for ultimately getting more eyes on those affiliate links.
ThirstyAffiliates states it’s a “tool designed for blogger to make money”; as such, their premium version comes with many other useful additions for affiliate marketers.
I was actually surprised by how many features they offer in their premium version, and I do see it as being a useful tool for affiliates.
Now, here’s how you can easily create your first cloaked affiliate link with ThirstyAffiliates (free or paid version):
Step 1: Download and Install ThirstyAffiliates

First, download, install, and activate Thirsty Affiliates (free or paid).
Step 2: Configure ThirstyAffiliates Settings
From the admin side panel, go to ThirstyAffiliates->Settings, then click “Link Appearance” from their menu.
There are some options you’ll probably want to change before making your first cloaked link.
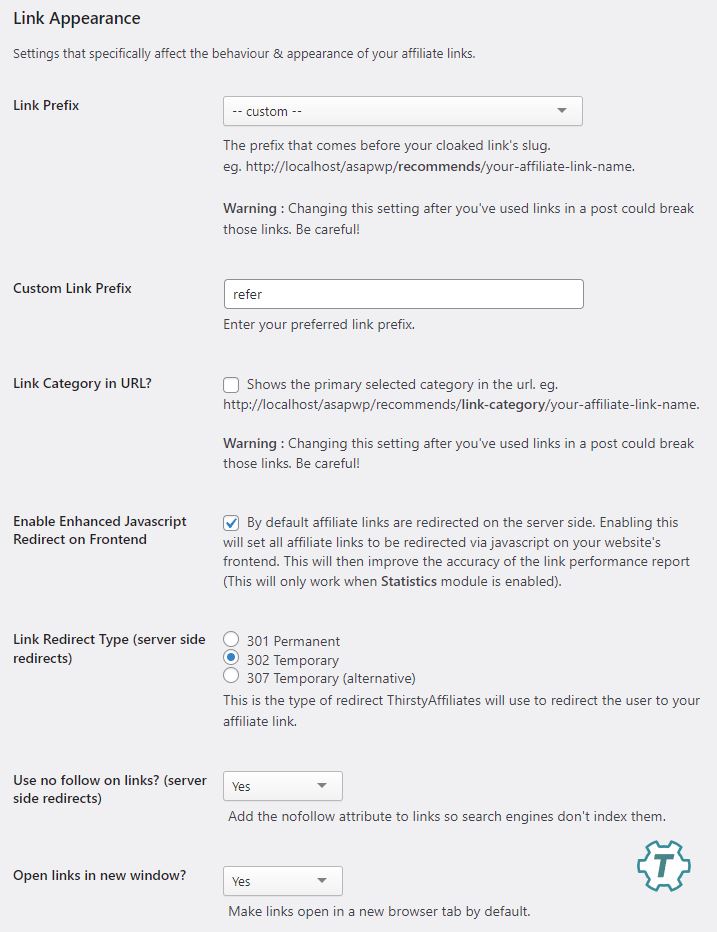
For Link Prefix, you can select the base slug/prefix you want to apply to all cloaked links you create.
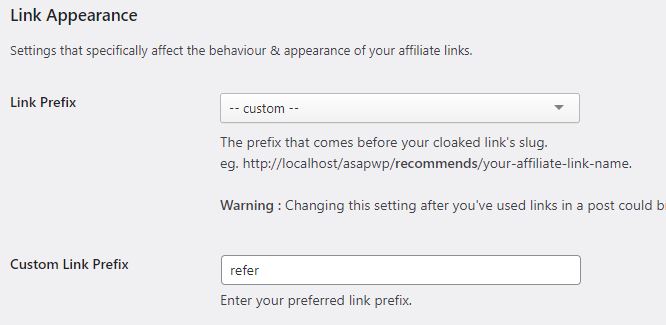
This will make your links look like this:
https://yourwebsite.com/base-slug/your-offer
This is good for identifying your affiliate links, looks clean, and won’t conflict with any other posts/pages that might have the same name.
You can either choose from their presets or define your own, such as “refer”, which is what this site is using.
Next, you’ll probably want to apply nofollow by default to all of your affiliate links that you create.
This can be achieved by setting “Use nofollow on links” section to “Yes”.

For “Open links in new window?” you might also want to set this to “Yes”.

This will make it so your affiliate links will open in a new browser tab when clicked.
Step 3: Create Your First Cloaked Affiliate Link
Go to ThirstyAffiliates->New Affiliate Link from the admin side panel to create your first cloaked affiliate link.
Here we have several options, but we only need to enter a couple of things to get our first working cloaked link.
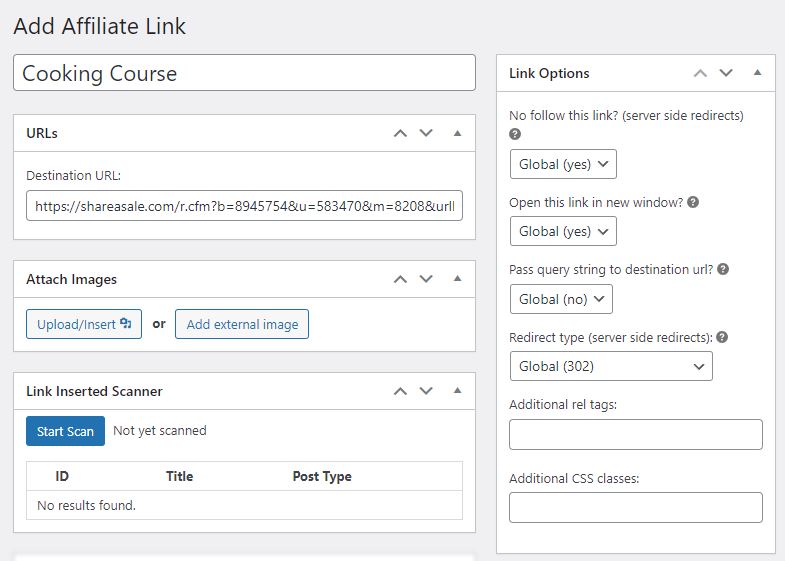
Give the cloaked link a name to identify it.
In the “URLs” section, for “Destination URL”, here you will enter your regular (messy) affiliate link.
We can ignore the “Attach Images” section, since we only want a regular cloaked link.
In the side panel, for “Link Options” we can see the options we set in Settings are set as default, so we can leave this alone too.
Simply, the page and your link will be created.
Step 4: Check Out Your Cloaked Link
Back at the main page for ThirstyAffiliates, we can now see our new cloaked affiliate link.

In this example, the “Link Destination” field consists of the original, messy affiliate link that I entered in the previous step:
https://shareasale.com/r.cfm?b=8945754&u=583470&m=8208&urllink=&afftrack=asapwp
In the Cloaked URL field, it has been transformed to:
https://asapwp.com/refer/cooking-course
Step 5: Use Your New Cloaked Link
Now all you have to do is place this clean, cloaked URL anywhere on your site.
And whenever a user clicks on it, it will automatically redirect them to the original affiliate URL.
Pretty Links

Pretty Links is a very popular link cloaking plugin.
It’s actually owned by the same company as ThirstyAffiliates: Caseproof.
It has a free version, Pretty Links Lite, and a paid version, Pretty Links Pro.
As with ThirstyAffiliates, you can easily create a cloaked link, simply by entering in your original, messy link and receiving a cloaked one:
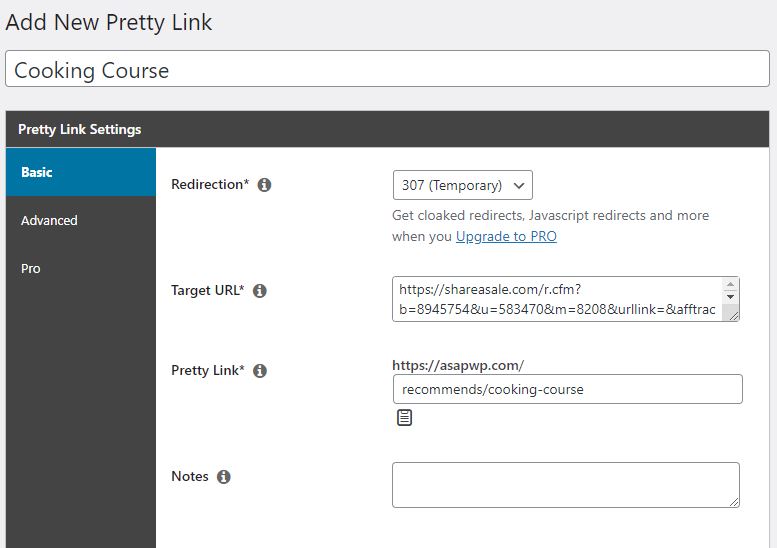
Here are the “Links” settings options for Pretty Links Lite:
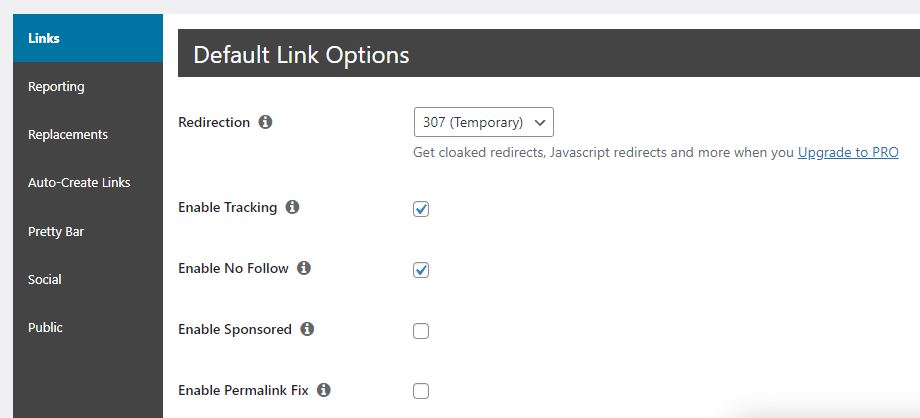
Where ThirstyAffiliates and Pretty Links Lite differ, is that ThirstyAffilaites offers more options in their free version.
For example, ThirstyAffiliates allows you to add a base slug (such as “/recommends/”) to your links automatically, by default.
Pretty Links Lite reserves this option for the paid version.
You can still add the base slug in the lite version, but you must edit the cloaked link manually to do so.
Both ThirstyAffiliates and Pretty Links Lite let you assign cloaked links to “link categories”.
You can create and use these link categories to better organize your affiliate links (like you do with posts).
However, while ThirstyAffiliate has this option available in their free version, Pretty Links Lite only has this feature in their paid version.
Easy Affiliate Links

Easy Affiliate Links is another popular plugin.
It has a free version and a premium version.
As their name suggests, creating cloaked affiliate links is indeed easy:
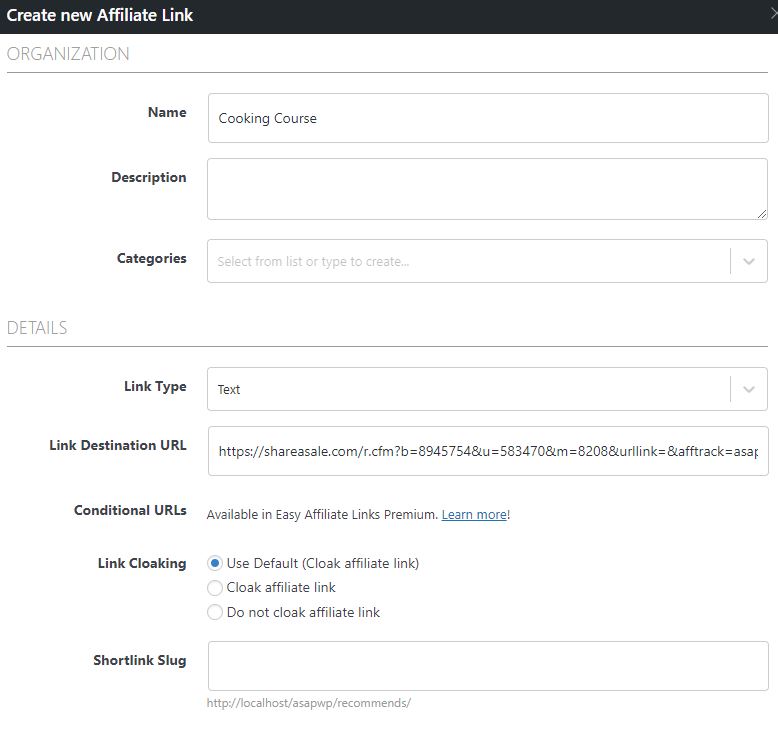
Their settings are similar to the other two plugins:
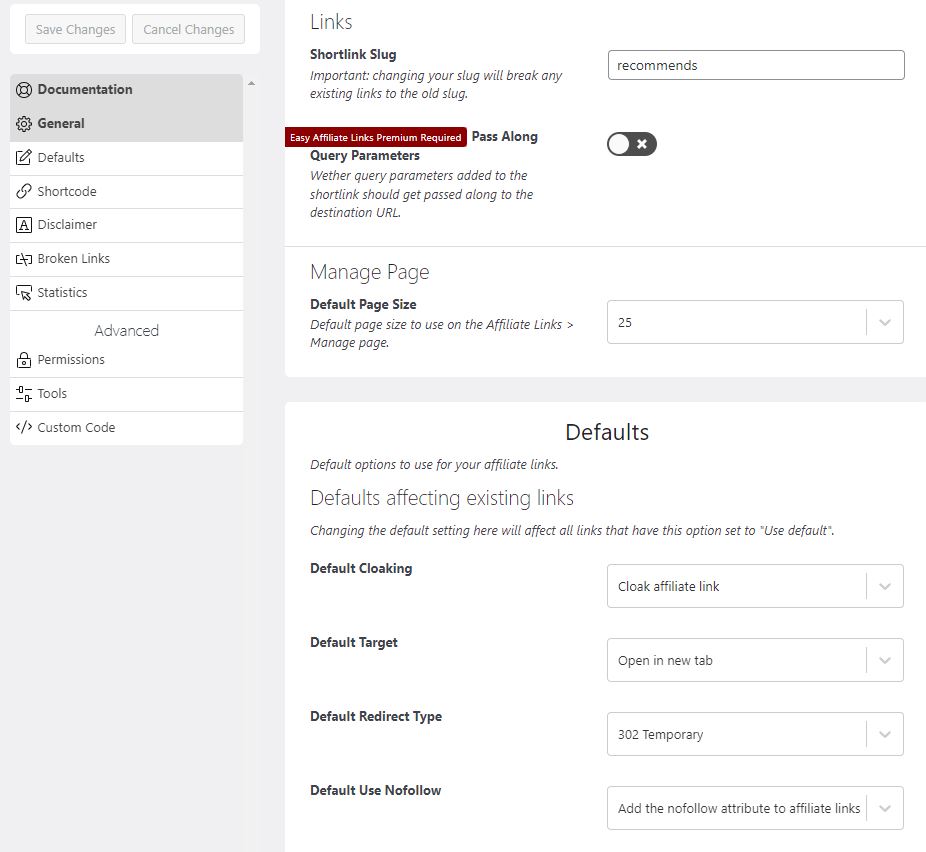
Like ThirstyAffiliates, and unlike Pretty Links, they do allow you to create link categories in their free version.
Easy Affiliate Links also allows you to view reports; however, they cap the free version’s data off at 10 clicks, unlike the other two plugins.
They do have a broken affiliate link checker; although instead of it being free like ThirstyAffiliate’s, it’s only available in their premium version.
URL Shortener by MyThemeShop

URL Shortener by MyThemeShop is another way to easily cloak your affiliate links:
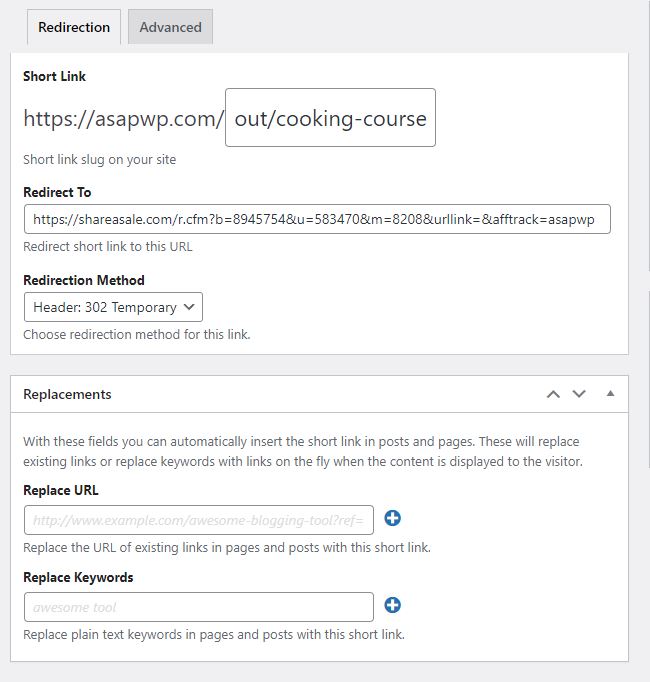
Here are its settings:
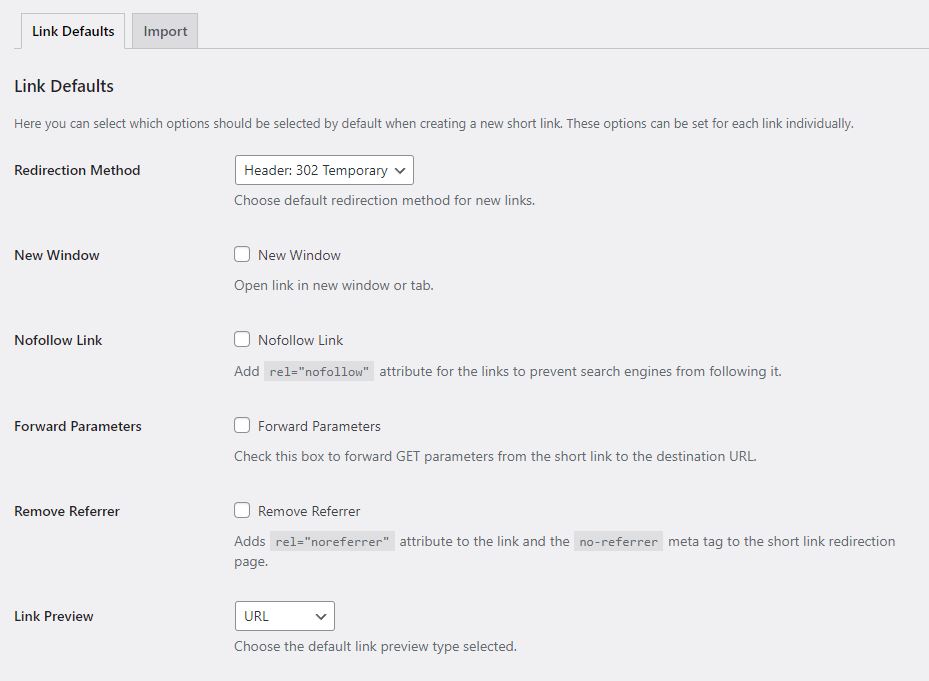
URL Shortener has the least number of settings and features compared to any plugin so far.
You will be able to do all of the basics, including creating cloaked links with 301, 302, or 307 redirect, add nofollow, and open in new tab.
However, there isn’t much else.
As a plus, this makes the UI simpler and easy to navigate.
It does allow you to create link categories for free; however, they did not seem to function properly in my test.
URL Shortify

URL Shortify is a simplistic link cloaking plugin.
With its simple UI, you can easily navigate through its interface and cloak your affiliate links:
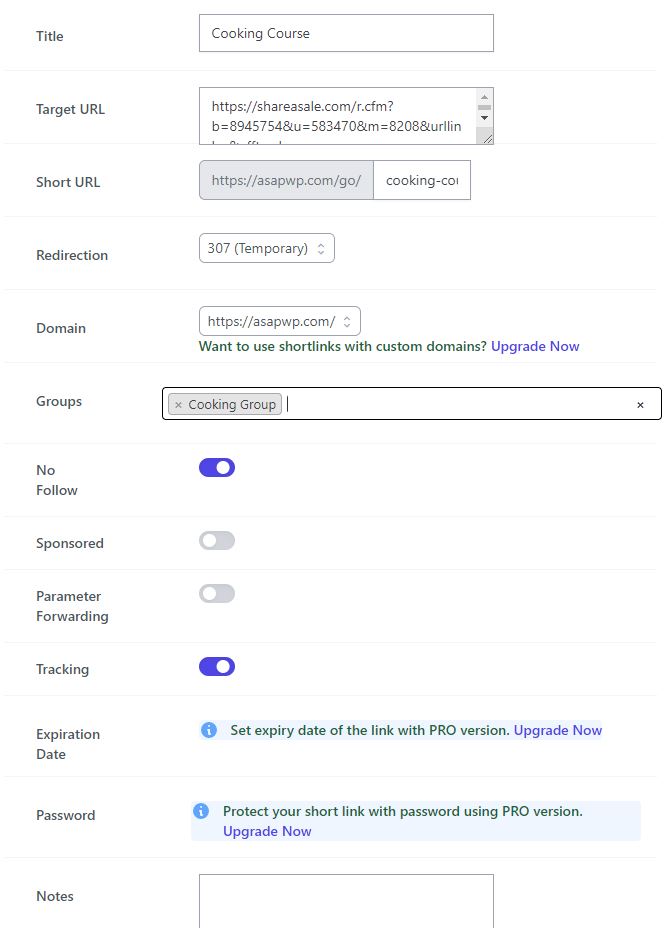
Here are its settings:
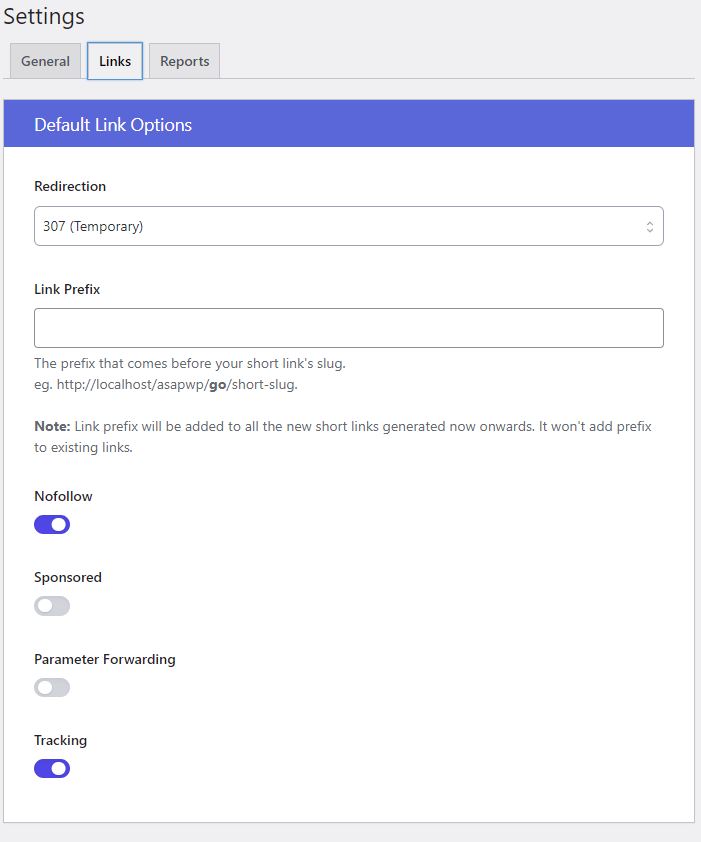
URL Shortify has a minimum number of settings but provides the basics that you’ll need, such as setting a default base slug/link prefix and nofollow.
Unlike some other plugins, in its free version URL Shortify offers link categories (referred to as “Groups”) to help organize your affiliate links
It also offers reports for free, where it shows metrics including the number of clicks, unique clicks, IP address, and some others.
One issue with URL Shortify is that it doesn’t seem to offer an option to allow affiliate links to open in a new tab.
How to Cloak Affiliate Links in WordPress Without a Plugin
You don’t always need a plugin to cloak your affiliate links.
This can appear to be a better option as it will reduce excess code, avoids installing another plugin, and will be faster.
However, it requires you to edit a file on your server whenever you want to add a new affiliate link.
You also won’t get any of the features offered by plugins, such as link statistics, fixers, scanners, and categories.
In order to achieve this without a plugin, you need to add a few files to your server using File Manager or an FTP program.
Step 1: Download the affiliate link redirect script
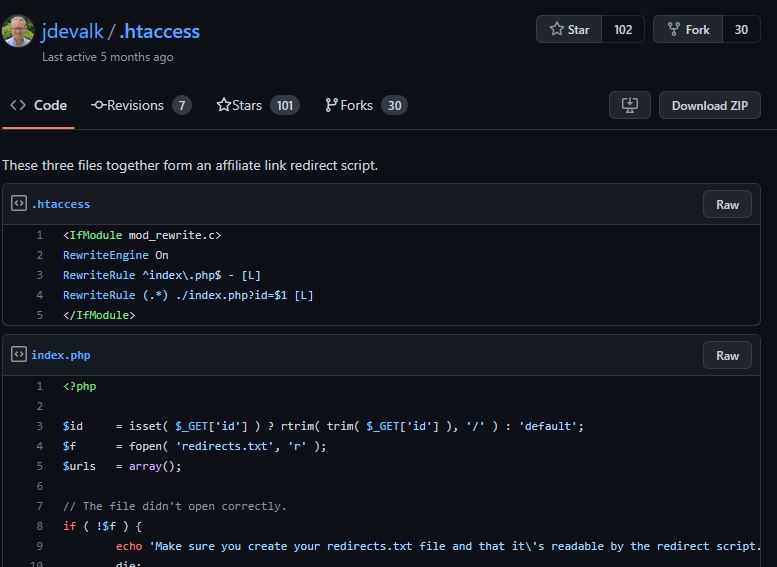
Team Yoast (the people behind the SEO plugin) have created a free script that you can download from Github.
You can choose to download the code snippets in a zip file or can simply copy-paste them into new files that you’ll create.
Step 2: Upload the script to your server
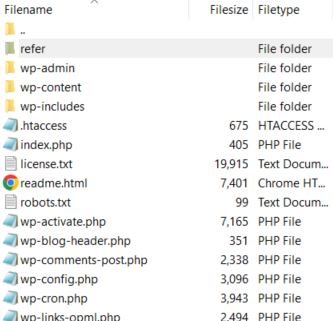
Connect to your server and create a new folder in the root directory of your site.
The name you give the folder will act as the base slug/link prefix for your cloaked affiliate links.
I like to use “refer” as a link prefix; as in, for example:
https://asapwp.com/refer/some-offer
So, I would name the folder “refer” (no quotes).
Step 3: Create an index.php file
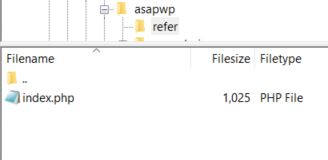
Inside this newly created folder, create a file called index.php and paste the index.php code from the Github link I provided in Step 1.
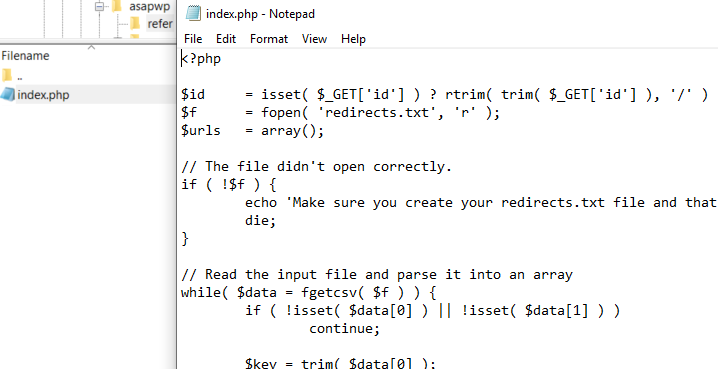
This code will handle the redirection by performing a 302 redirect; it will also ensure search engines obey nofollow and noindex for your affiliate links.
Step 4: Create your redirects.txt file and add your links
Create another new file in the same folder named “redirects.txt” (no quotes).
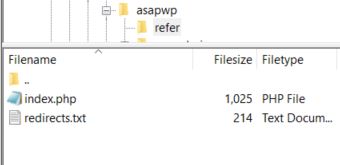
The redirects.txt file is a comma-separated file that will contain your list of affiliate links you want to cloak.
The format is:
link-slug,https:youraffiliatelink.com/?affid=123
In this file, you add your affiliate links with one link per line.
For example:
default,https://asapwp.com
cooking-course,https://shareasale.com/r.cfm?&afftrack=asapwp
keto-recipe-cookbook,https://affiliateurl.com/?affid=asapwp

Notice the first line is:
default,https://asapwp.com
Here you will change the URL to your website instead of mine.
This is not an affiliate link but needs to be present at the very first line of the redirection.txt file.
Step 5: Block crawlers in robots.txt
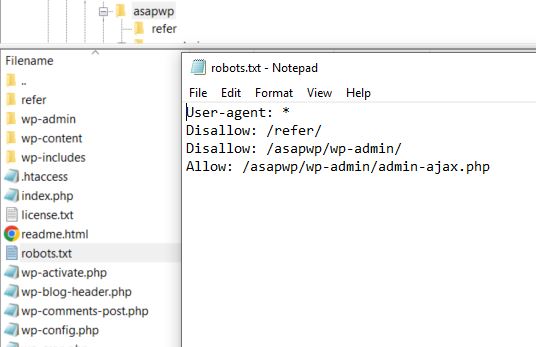
As an extra measure to prevent search engines from following your affiliate links, you can add the following to your site’s robots.txt file:
Disallow: /your-folder-name/
Change “your-folder-name” to the name you gave in Step 2.
In my case, it was “refer”; so, I’d put this into robots.txt:
Disallow: /refer/
Step 6: Place your cloaked affiliate links on your website
As it stands, the formula to add cloaked links on your website is:
https://yourwebsite.com/folder-name/?id=link-slug
- “/folder-name/” is the name of the folder you created in Step 2.
- “?id=” is required as a prefix before the link slug
- “link-slug” is the name of the link slug you created for the link that you want to use within redirects.txt file
Again, here is my redirects.txt file:
default,https://asapwp.com
cooking-course,https://shareasale.com/r.cfm?&afftrack=asapwp
keto-recipe-cookbook,https://affiliateurl.com/?affid=asapwp
So, if I wanted to add a cloaked link for the “cooking-course,https://shareasale.com…” link, I would insert this URL into a post:
https://asapwp.com/refer/?id=cooking-course
Step 7 (optional): Making your links prettier
Currently, when adding cloaked links, you have to prefix the link slug with “?id=”:
https://asapwp.com/refer/?id=cooking-course
Consequently, your cloaked links aren’t as pretty as they could be.
Here’s how to change that:
Within the folder you created in Step 2, create another file and name it “.htaccess” (no quotes).
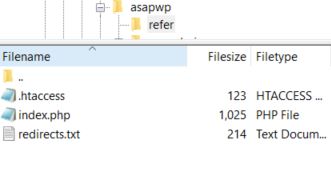
Inside this newly created .htaccess file, you can paste the .htaccess code from the Github link in Step 1.
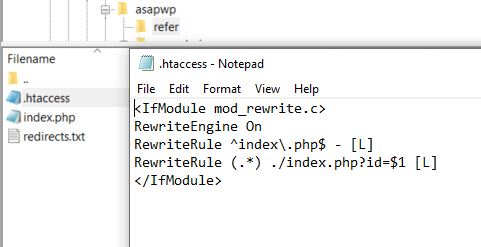
This makes it so you no longer need to use the “?id=” prefix when inserting links into pages/posts.
Links can now be inserted with the following formula:
https://yourwebsite.com/folder-name/link-slug
For example:
https://asapwp.com/refer/cooking-course
Conclusion
Cloaking your affiliate links makes them shorter and cleaner.
This makes them look better and appear more trustworthy, which can result in more clicks from your visitors.
Cloaking your links also allows you to update all instances of any particular affiliate link across your site all at once, rather than having to do it individually for each link.
With some plugins, you can even get link-click reports, scan for expired affiliate links, or set any particular word to automatically become an associated affiliate link.
The most convenient way to cloak your links is by using a plugin; however, you can also do it with some code snippets.
Hopefully, this helped you learn how to cloak your affiliate links in WordPress. And ideally, will result in more commissions for you.
