Today I’ll show you how you can create a clone of your existing WordPress website.
This is extremely useful and is something I personally do on just about every site that I develop.
The process is straightforward and free.
It will allow you to easily make changes as well as test new features and plugins without having to risk problems occurring on your live site.
Plus, once you’ve learned how to clone your website, you’ll be able to reproduce the process for other sites in only a few minutes.
Why You Should Create a Clone of Your Site
Any time you want to make changes to your website, where those changes have some potential to cause issues if done incorrectly, you should first do them on a copy of that website, rather than your actual website.
Simply put, it is better to be safe than sorry.
These changes can include:
- Adding new plugins/themes
- Updating WordPress core/themes/plugins
- Adding code to your site, such as through Theme File Editor –> functions.php
Any of these changes, if a problem arises, could cause website breaking issues.
The last thing you want is to be scrambling about after something goes wrong, frantically trying to undo an error while your site is live on the internet.
Better to make changes on a copy of your website first, and then add them to your live website.
Different Ways to Clone Your WordPress Website
There are many different ways you can create a copy of your live website.
For example, popular software exists for this purpose, including:
- XAMPP
- MAMP
- WAMP
- Local By Flywheel
- DesktopServer (retired)
Also, some managed hosting services include staging environments, as part of their offered features, for this very purpose.
Although often, this is a feature found with more expensive hosting platforms.
So, I’ll instead show you a free and simple way to clone your existing website; the way I do it for many of my own WordPress websites.
And once you’ve gotten all the steps figured out, cloning other websites literally takes about 10 minutes to do.
Cloning Your Live Website with Duplicator
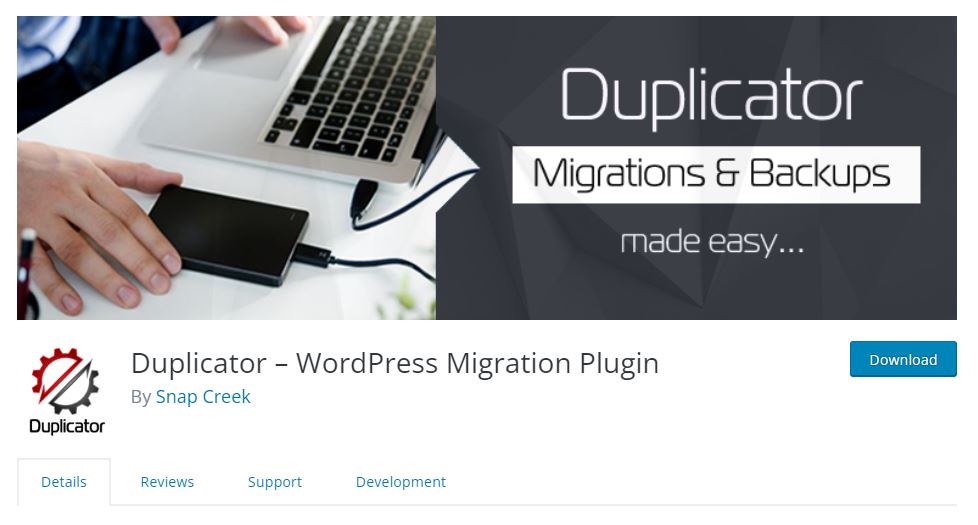
Step 1: Download and Install Duplicator Plugin
The first step involves downloading and installing the very popular WordPress plugin called Duplicator.
To create a clone of your existing website, you’ll need copies of the website files and database.
There are several ways you can achieve this, but a very simple and fast way is with Duplicator.
I use this plugin every time I want to make a local copy of my site, because of how easy it is to use.
Step 2: Create a Duplicator Package
After installing and activating Duplicator, locate and go to it via the admin menu bar.
Select “Create new” to create a new package.
On the following screen, you’ve got some options here, such as excluding parts of your site’s files/folders or database tables from the package, password protecting the installer, and some Duplicator Pro features.
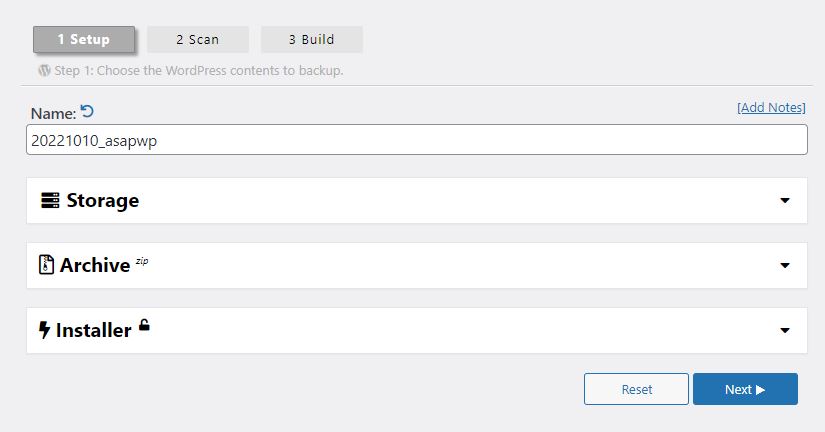
Unless you require these things, you can simply leave everything as is and press the “Next” button to proceed.
On this screen, Duplicator will undergo a scan and give feedback on the state of the package.
- If everything is “Good” proceed and press “Build” button.
- If there are warnings, read them to see if they present any real problems. If they do not, proceed and press “Build” button.
- If there are warnings that need to be addressed, see troubleshooting in the next section.
If everything went smoothly, you should have a duplicator package, consisting of two files: a zip of your website files and an installer.php file.
Be sure to download both files to your computer.
Step 3: Duplicator Troubleshooting
Very often Duplicator will throw warnings when scanning for the package creation.
The most common I’ve experienced are:
- Size limits
- Host interrupts
1. Size Limits
If your site is simply too big for the package, a little trick you can do is exclude the ‘/wp-content/uploads’ folder.
This contains all of your site’s uploaded content, such as images and whatever else has been uploaded.
This folder is usually quite large from all the images; so, simply excluding it from the package will put a considerable dent in freeing up space.
Later, you can manually add the uploads folder back if you require your site’s images on your cloned website.
To exclude uploads folder, go back one screen in Duplicator package creation, to where the options I previously mentioned are.
Click “Archive” section dropdown, then check the box “Enable file filters”, and locate and click “[wp-uploads]” text atop the text box.
This should add the path to your uploads folder.
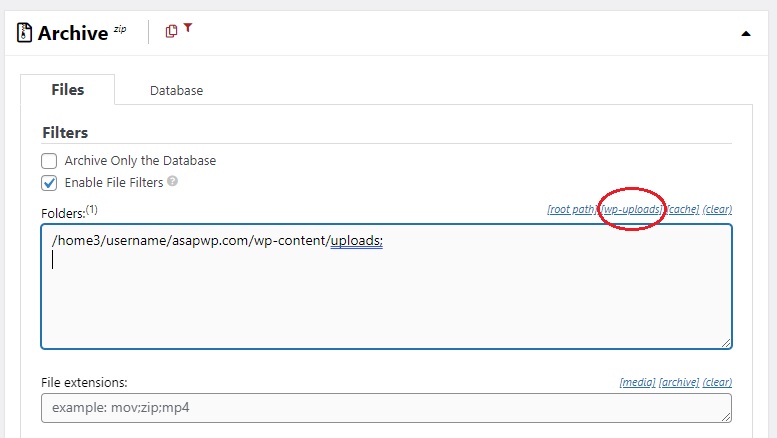
Now proceed to the next screen and scan and build the package.
2. Host Interrupts
More budget conscious hosts can sometimes cause issues with the building process of the package completing.
If it fails from interrupt, you have a few options.
You can try to compress the package using .daf format instead of the default .zip.
To do this, go to Duplicator –> Settings from the admin side menu, then “Packages” tab.
Under “Archive Engine” section, check DupArchive instead of Zip.
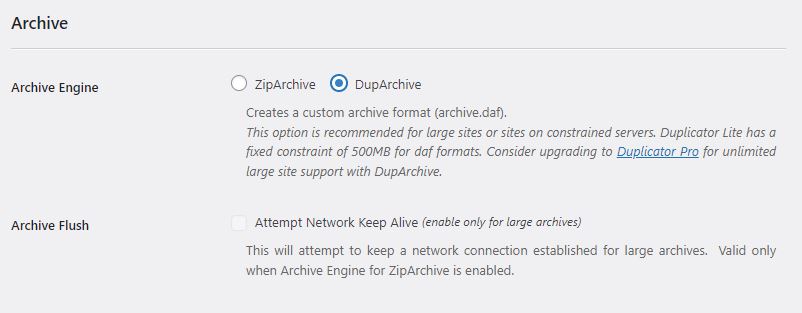
Now try and scan and build the package and hopefully it will work.
Note: Sometimes if the previous package is incomplete due to host interrupt, it will prevent you from attempting to build another package.
To fix this, you need to delete the incomplete package. If you can’t delete it from the “Packages” screen, go to Duplicator –> Settings, then “General” tab.
Scroll down to “Advanced” section and press “Reset packages” button.

This will delete the incomplete package, and now you can proceed to build a new package.
Still have problems?
If none of the options so far have worked, you can try a Two-part install.
Alternatively, if you believe this is something you’ll get use from, you might want to consider purchasing Duplicator Pro.
It’s multi-threaded rather than the free version’s single-threaded and allows for .daf packages over the 500mb limit of the free version.
Serving Your Site with XAMPP
Now with a copy of your site files and database, you can install your site using XAMPP.
XAMPP is a free Apache distribution containing MariaDB, PHP, and Perl.
Combined with the Duplicator package you previously created, it will allow you to have an offline clone of your website running from your computer.
Step 1: Download and Install XAMPP
Before you download XAMPP, go to your live site admin menu panel: Tools–>Site Health, then click the “Info” tab at the top.
Find the “Server” drop down and make note of the PHP version your web server currently is using.
At this time, my server’s PHP version is 7.3.33.

Now, try to download the version of XAMPP that has the same (or closest to) PHP number that your web server is using.
XAMPP names the software’s version number after its PHP version.
After you’ve downloaded XAMPP, install it on your computer.
Take note where it is installing to; usually, it will be at root directory of your computer’s hard drive (e.g. C:\)
Step 2: Run XAMPP
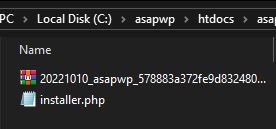
Go to where the XAMPP folder was installed; once inside it, locate the “htdocs” folder.
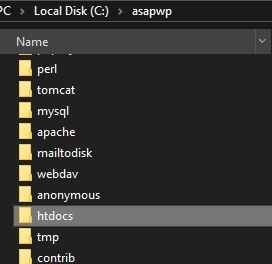
Inside htdocs, create a new folder and give it a name that you like, such as the name of your website (e.g. asapwp).
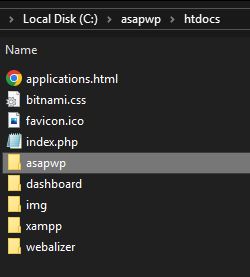
It is in this folder where you will now put the previous Duplicator package files that you created: installer.php and the zip file or daf file.
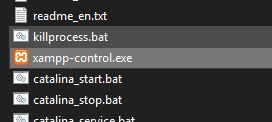
Now return to back to the uppermost part of the XAMPP folder and locate and open “xamp-control.exe”.
- Under Apache module, press the start button.
- Under MySQL module, press the start button.
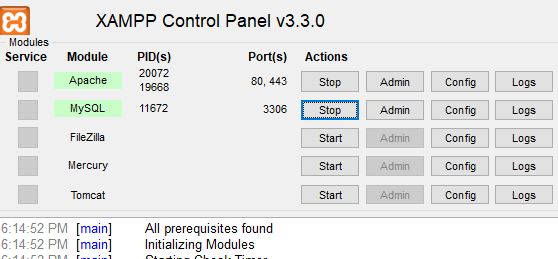
Whenever you want to work on this offline copy of your site, you will need to open this control panel and start those two modules, as they are the server and database required to run your site.
Step 3: Create a Database
Go to your preferred internet browser and enter “localhost” into the address bar.
Next, click on the “phpMyAdmin” at the top.
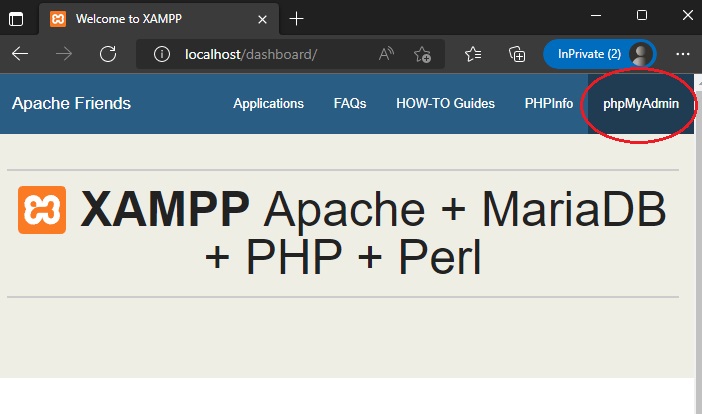
Once that’s opened, click the “Database” tab at the top. Under “Create database”, you’ll see two fields:
In the first field, enter a database name of your choosing and click the create button.
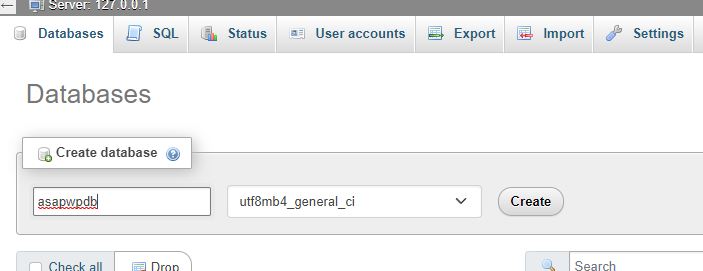
This will create a new database we’ll use for your website.
Step 4: Run Duplicator Installer
Recall the name of the folder you made within the htdocs folder, where you placed your Duplicator package files into.
You’ll need to enter this folder name as part of a URL:
Back in your browser’s address bar, type “localhost/TheNameOfYourFolder/installer.php”
In my case, I’d enter “localhost/asapwp/installer.php” in my address bar.
Once on the deployment screen, under the “Setup” section, there are two fields we’ll need to type into:
For the “Database” field enter the name of the database you just created in the previous step.
For the “User” field, simply enter “root” (no quotes). You can leave the “Password” field empty.
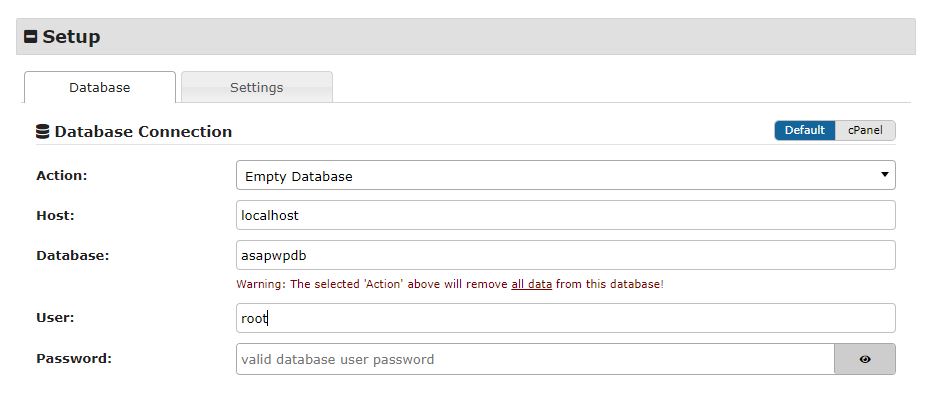
If “General” and “Filesystem” return a pass, check the user agreement checkbox off and press “Next” to proceed.
Duplicator should now begin extracting and creating a copy of your website.
If everything worked, it will prompt you to login.
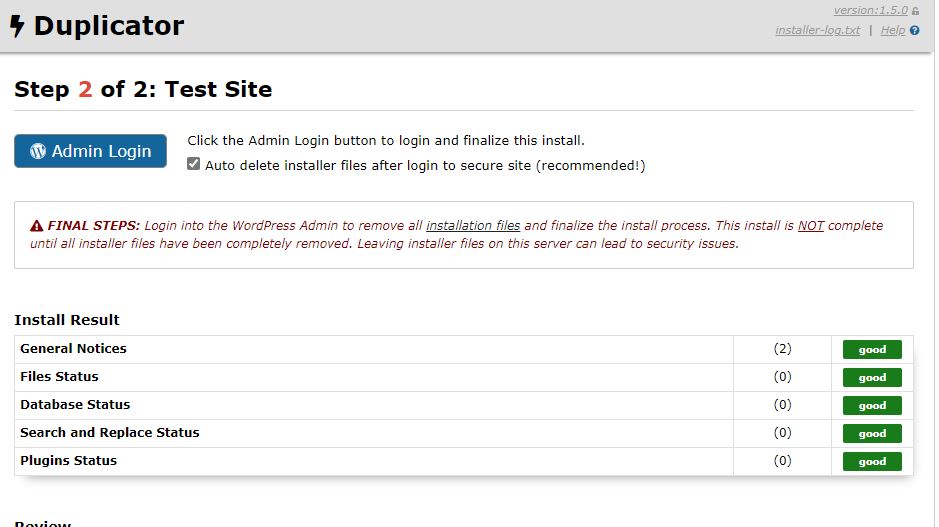
Step 5: Accessing Your Copied Website
At this point, you now have a copy of your live website, and it will remain accessible from your computer at any time.
To access your website now and at any point in the future, you’ll want to enter localhost with a trailing slash followed by the name of your website’s folder you made in htdocs.
For me this would be:
- Homepage: “localhost/asapwp”
- To Login: “localhost/asapwp/wp-admin”
Just remember that in order for your site to work, you need to have Apache and MySQL modules started in the XAMPP control panel.
Making Edits to Your Site Files
If you ever need to access your websites files, such as to add themes, plugins, or code manually, remember that you’ll be able to find your website’s files from inside its folder that you created previously in htdocs.
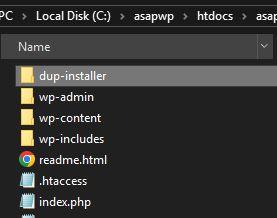
Since these files are stored locally on your PC, making changes to them is more convenient and faster than for your live site, where you’re probably using cPanel’s File Manager or an FTP program.
Conclusion
Whenever you want to install new plugins, themes, or add additional code to your website, it’s best to first make those changes on a copy of that website.
That way, if anything goes wrong, your live site is safe.
You can easily create your own staging site, and for free, in only a few minutes once you’ve figured out the process.
