Are you looking for how to create your own affiliate program for your WordPress website?
Creating your own affiliate program will save you money and give you better control compared to letting a service handle it for you.
While you might think this is difficult, nowadays it’s actually very simple to do.
In very little time at all, you can have a complete, fully functioning affiliate program on your site.
Get affiliates, provide referral links, coupons, banners, and even a fully-fledged affiliate dashboard for them to track their performance.
You can do all of this, and very easily.
In this complete guide, I’ll show you exactly how to set it all up.
Why Create Your Own Affiliate Network
You can either create and run your own affiliate program or you can pay an existing one to use their service.
Both will effectively allow you to gather affiliates to promote your products in exchange for compensation (i.e. commissions).
Here are a few reasons why it can be better to create and run your own affiliate network rather than paying to use an existing one:
It Can be Cheaper to Run Your Own Affiliate Program
Affiliate program plugins for WordPress can range from between $50-$300.
Conversely, signing on as a merchant for an affiliate network can cost several hundreds of dollars upfront.
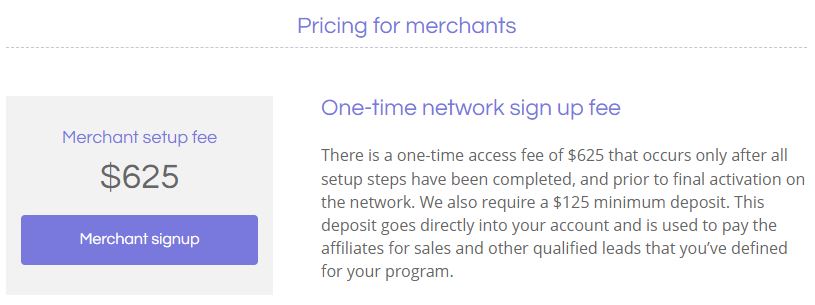
For example, the popular affiliate network ShareASale, (at the time of this post) charges new merchants a sign up fee of $625.
They also require a $125 minimum deposit as a means to initially pay your affiliates.
Another important cost to mention, and what will amount to the largest of savings or expenditure, are the purchase transaction fees.
When you sign on for an existing affiliate network as a merchant, they typically want to charge you for more than just an initial sign up fee.
Because it is far more profitable if they can charge a fee on every purchase transaction (just like a payment processor would).
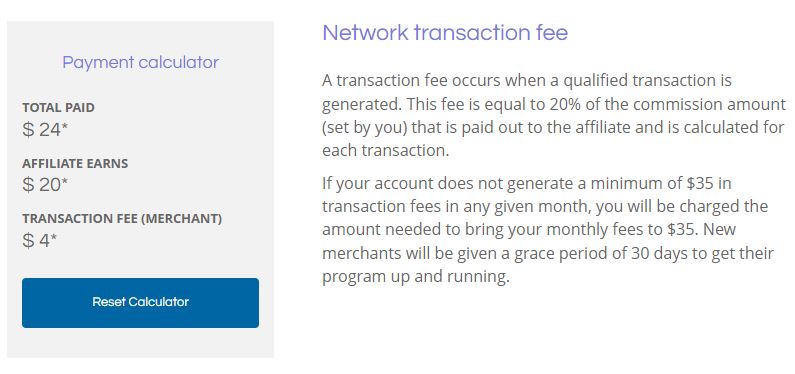
For example, ShareASale takes a 20% cut of the amount you’ve set each affiliate to earn per transaction, for every transaction.
So, let’s suppose you are selling a $100 product and give your affiliates 20% commission on each sale (which amounts to a $20 commission).
ShareASale would take 20% of your affiliate’s cut (which in the case of this example, would amount to $4) from you.
That means for our $100 example product with a 20% commission for our affiliates, ShareASales would take $4 of every successful sale from your merchant account for their transaction fees.
Obviously, this can add up to a lot of additional costs for you.
Plus, you’re already paying a transaction fee from the payment processor you’re using on your website to actually sell your products.
ShareASale even has an additional condition stating that if you do not perform enough sales to generate at least $35 in transaction fees, you will pay them the difference.

This ensures they can continue to make some money off of you even if you’re not very successful.
On the other hand, when creating and running your own affiliate program you do not pay any transaction fees per sale.
However, you will probably be paying a transaction fee whenever and however you choose to pay out your affiliates on your end each month.
And this will depend entirely on how you choose to pay out your affiliates.
For example, if you choose to do this using PayPal, they will charge 3.49% + $0.49 (for domestic US transactions).
Although since PayPal deducts the fee from the receiver not the sender, you could actually pay zero transaction fees, allowing your affiliates to naturally absorb the cost.
Alternatively, if choose to pay your affiliates via a standard wire transfer, you can save money this way as well.
Overall, it’s almost always going to be cheaper to run your own affiliate network rather than paying a service to run it for you.
More Control
When you pay a service to use their affiliate program, you give up more control to them.
If you want to do something a certain way, it might not be allowed by them.
Additionally, if there are features that you want to implement, and their service does not have them, then you’re out of luck.
Of course, when running your own affiliate program, you are still at the limitations of the software.
However, since WordPress affiliate programs are made to work with WordPress, they can also work alongside other plugins.
For example, I was able to use my Free Gifts for WooCommerce plugin in combination with my affiliate program plugin.
This allowed me to associate a coupon to an affiliate, making it so when a customer used the coupon, they received a free gift and the affiliate got their commission.
You could even hire a coder to make something work for you if you couldn’t find a solution, unlike when using an affiliate network as a service.
It’s Really Easy Now
In the past, it made more sense to sign up as with an affiliate network service.
As consumer affiliate software either didn’t exist or was far more challenging to use.
Nowadays, these WordPress plugins are essentially install, activate, change a few settings, and your affiliate program is up and running.
How to Create an Affiliate Program with AffiliateWP
For one of my online stores, I wanted to have an affiliate program to help increase my sales.
After looking at a few options, I decided to go with AffiliateWP, and I can recommend it.
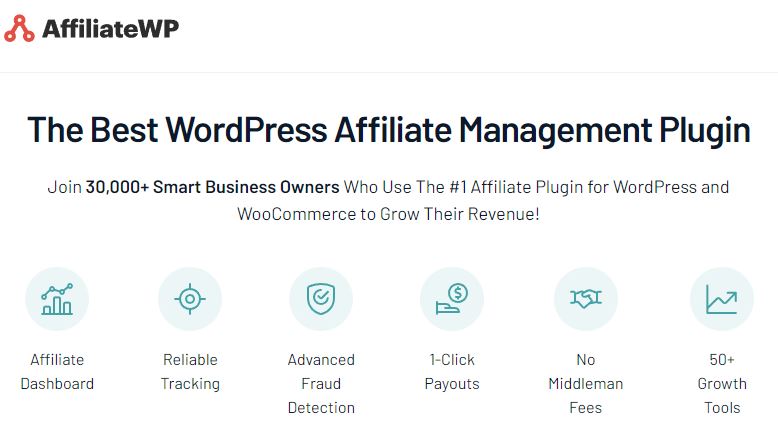
AffiliateWP will basically run itself out of the box; simply installing and activating will already provide you with a functioning affiliate program.
It offers many features, such as:
- Pretty referral links: offer your customers shorter, cleaner referral links to promote (“example.com/ref/(affiliate-username)/”
- Vanity coupons: affiliates can create and name their own coupon codes from within their affiliate dashboard
- Sleek affiliate dashboard: a sleek pre-built affiliate dashboard that works well on every device (or use your own leveraging your theme’s styling)
- Affiliate landing pages: associate any page/post to store a cookie for a particular affiliate user; you can offer your affiliates their own landing pages or even blog posts to promote and they’ll still get a commission if the customer clicks through, reads, and eventually makes a purchase
- Automatic emails: automatically will send email to notify your affiliates when they’ve made a successful referral as well as notifying you of the same; affiliates can choose to opt out of these emails from within their dashboard
- Commission structures: set your affiliate commission to one-time, recurring, or tiered affiliate commission to encourage growth
- Reports and graphs: affiliates can track their referrals with metrics, including graphs over time periods
- 1-click payouts: easy payouts to affiliates when integrating with PayPal or Stripe.
They offer many more features, too many for me to name here, and seem to be adding more over time.
AffiliateWP can also easily integrate with popular plugins, such as:
- WooCommerce
- Easy Digital Downloads
- MemberPress
- Paid Memberships Pro
- Gravity Forms
But let’s get into how to set up AffiliateWP:
Step 1: Download, Install, and Activate AffiliateWP
The first step is to install and activate AffiliateWP.
Step 2: General Settings
Once activated, go to admin side panel AffiliateWP->Settings, then “General” tab.
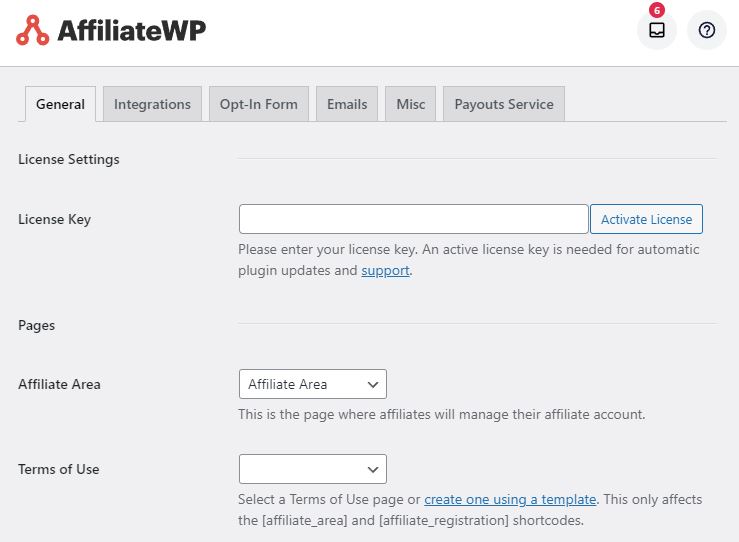
Upon activation, the plugin will automatically create a page called “Affiliate Area”.
This is where your affiliates will sign up, login, and view their dashboard.
For “Terms of Use”, clicking “create one using a template” will let AffiliateWP create a terms of service page.
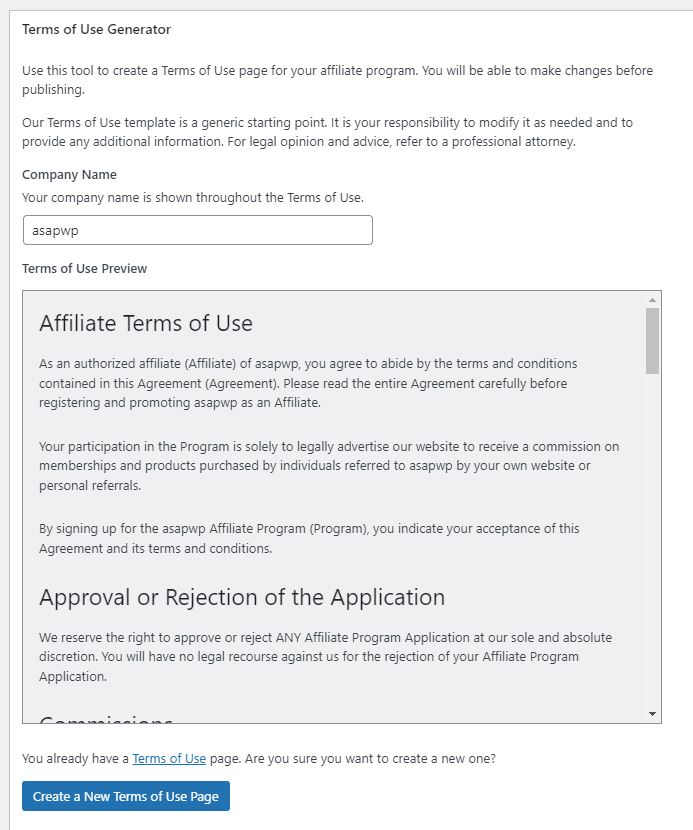
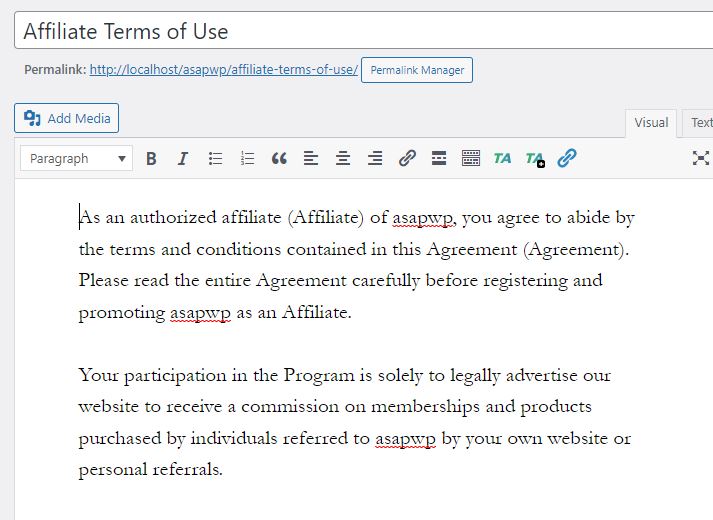
Clicking “Create a New Terms of Use Page” will create a pre-made terms of use that you can use on your site for your Affiliate program.
For “Referral Variable”, this is the prefix that will appear in URLs that you give to your affiliates.

The “ref” part will come before the unique affiliate identifier.
For example:
https://example.com/ref/affiliate-username
If you don’t want “ref” to be the prefix in your affiliate URLs, you can change it to whatever you want.
Next setting is “Default Referral Format”.

Here you can change the affiliate identifier in affiliate URLs to either be a number (associated to that affiliate) or the affiliate’s username.
For example:
https://example.com/ref/22
https://example.com/ref/affiliate-username
I prefer username, because affiliates can have their name in their affiliate links when promoting to their audience.
The next option is “Pretty Affiliate URLs”.

There are two options for affiliate URL structure; one uses query parameter and the other simple words.
https://example.com/?ref=affiliate-username
https://example.com/ref/affiliate-username
I keep this checked as it will produce the bottom URL from the example links above, which is a cleaner looking affiliate URL.
Next option is “Credit Last Referrer”.

Here you can set whether the last affiliate who referred a customer will be credited the commission from a successful sale.
Otherwise, it will be the very first affiliate who referred the customer that receives the commission, so long as the cookie lasts.
Some more important options on this page include:
- Referral Rate Type: Choose to set a referral rate for affiliates based on a percentage of the sale or a flat dollar amount per product sold or per order.
- Referral Rate: The number entered here will either apply (based on the previous referral rate type chosen) as the percentage or the dollar amount an affiliate will receive per successful sale
- Exclude Shipping: exclude shipping costs from referral calculation
- Exclude tax: exclude taxes from referral calculation
- Cookie expiration: sets how many days the referral tracking cookie will be valid for
For my purposes, I chose a percentage referral rate type of 20% for affiliates.
I excluded shipping from referral calculation, only wanting affiliates commission to be based on a cut of the actual products sold.
For cookie expiration, it defaults to 30 days. This determines the duration the cookie will be stored to credit the affiliate.
In this section, you can also determine how the affiliate area will appear to non-logged in users.
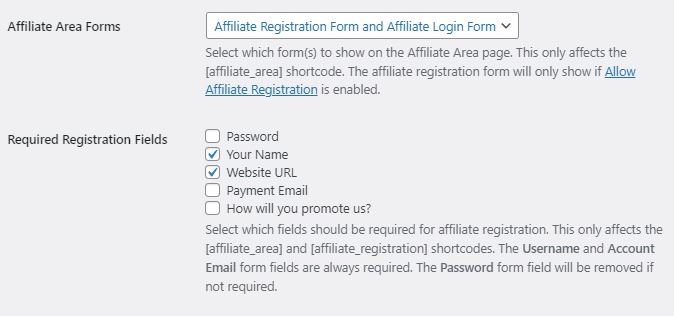
Select whether to display a registration and/or login form.
Additionally, you can choose which registration fields are required during affiliate application.
Step 3: Integration Settings
Back at the top of the “Settings” page you’re currently on, click on the “Integrations” tab.
In this section, you can click on any plugin that you want AffiliateWP to integrate with.
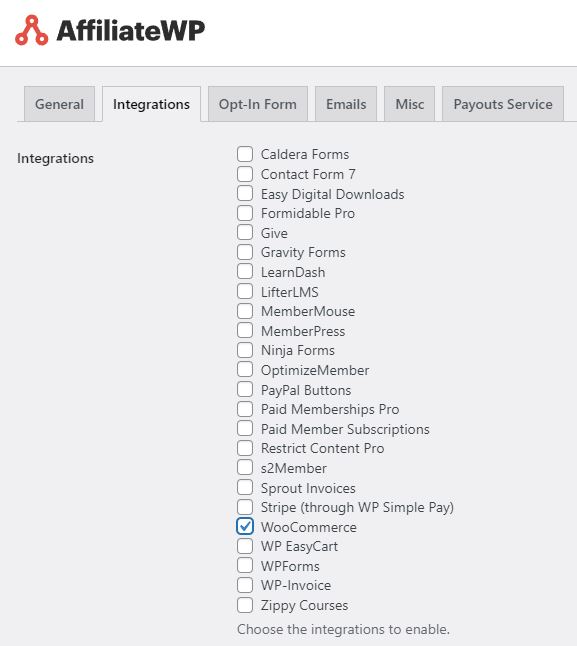
Click on whichever plugin(s) are going to be associated with your affiliate program.
For me, I’m only using WooCommerce, so I will select that.
In the case of WooCommerce, this will automatically generate referral records when a customer is successfully referred to your store via an affiliate link.
Additionally, it will allow AffiliateWP to leverage some existing features of WooCommerce for use in your affiliate program.
For example, it will enable WooCommerce coupons to be used as affiliate coupons.
Step 4: Email Settings
Back at the top of the “Settings” page you’re currently on, head to the “Emails” tab.
In this section, you can determine which emails get sent out and for what reason.
Additionally, you can customize these email templates as you see fit.
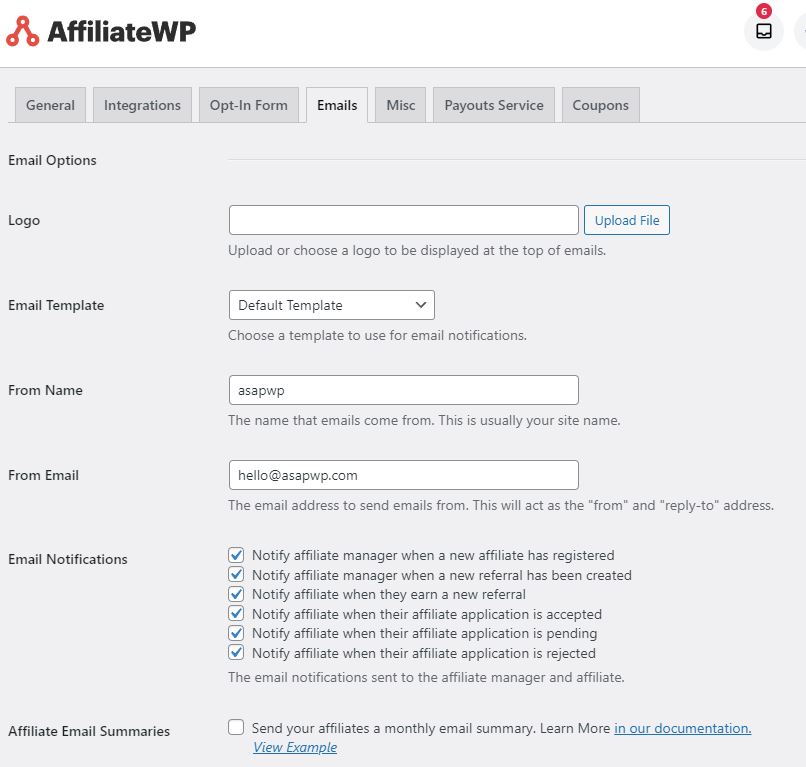
One of the nice things about AffiliateWP is that it can automatically send out emails for the following:
- Notify affiliates and yourself (affiliate manager) know when a referral led to a sale.
- Notify affiliate manager when a new referral has been registered
- Notify affiliate manager when a new affiliate has registered
- Notify affiliate when their application is accepted, pending, or rejected
You can disable or enable which emails you want sent out automatically, by simply checking a box.

By default, emails will be sent out using a simple white template with light grey background.
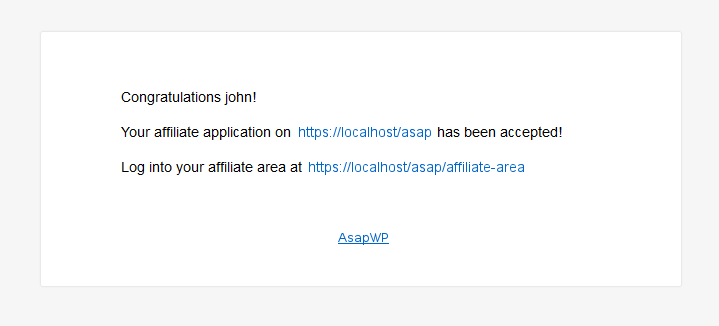
For example, an automated email of an affiliate registration confirmation:
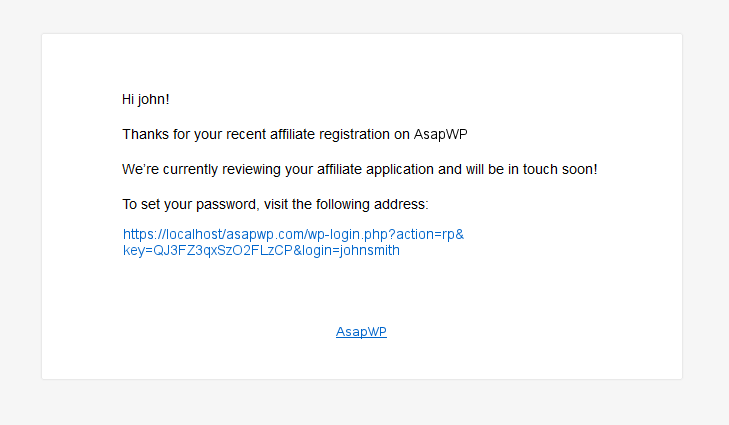
You can upload your logo to be displayed at the top of these emails to make them your own.

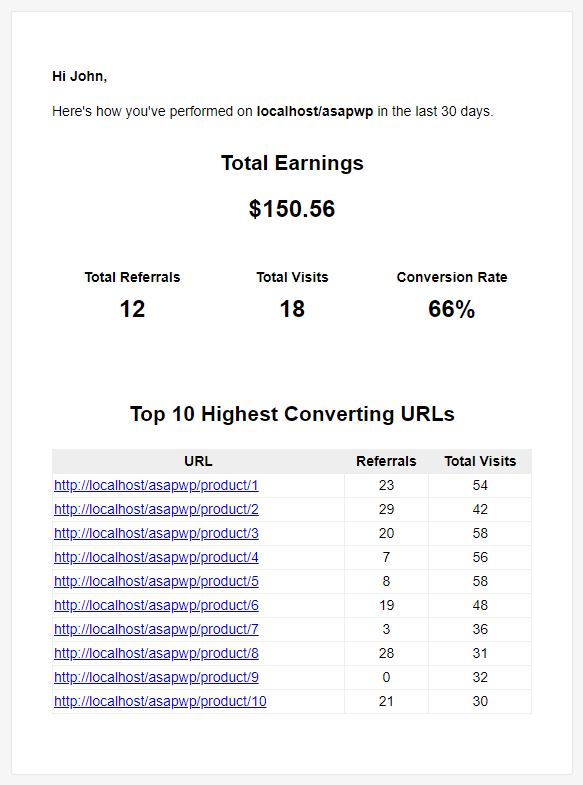
AffiliateWP can even send your affiliates a monthly report summary of their performance as an affiliate.

All of the emails sent to affiliates can be customized by editing the associated template using text and template tags.
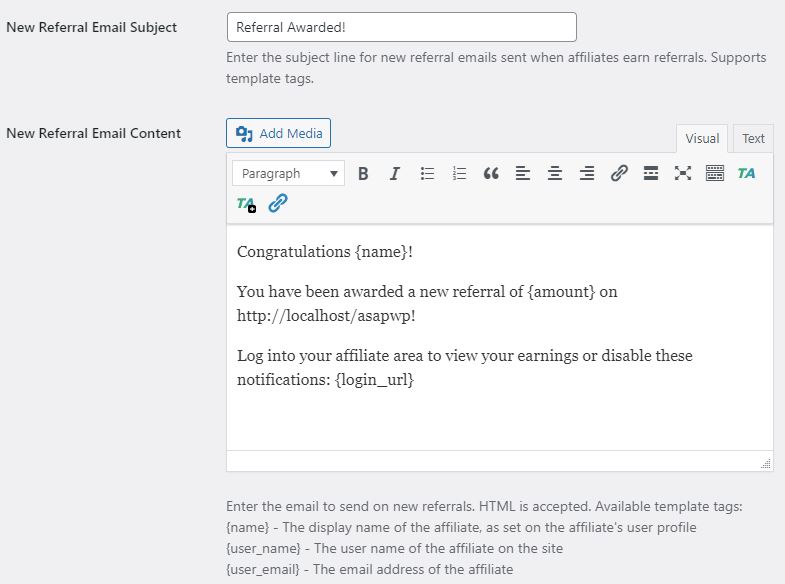
Everything will be functioning here with their default settings.
Affiliate-related mail will be sent automatically through WordPress’ default PHP Mail or SMTP if you’ve set that up.
One thing I’d be sure to at least do on this page is to upload a brand logo, so your emails look more personalized.
Step 5: Misc Settings
Next, we can go to the “Misc” tab still on the “Settings” page.
There are several options for more affiliate-related features and rules.
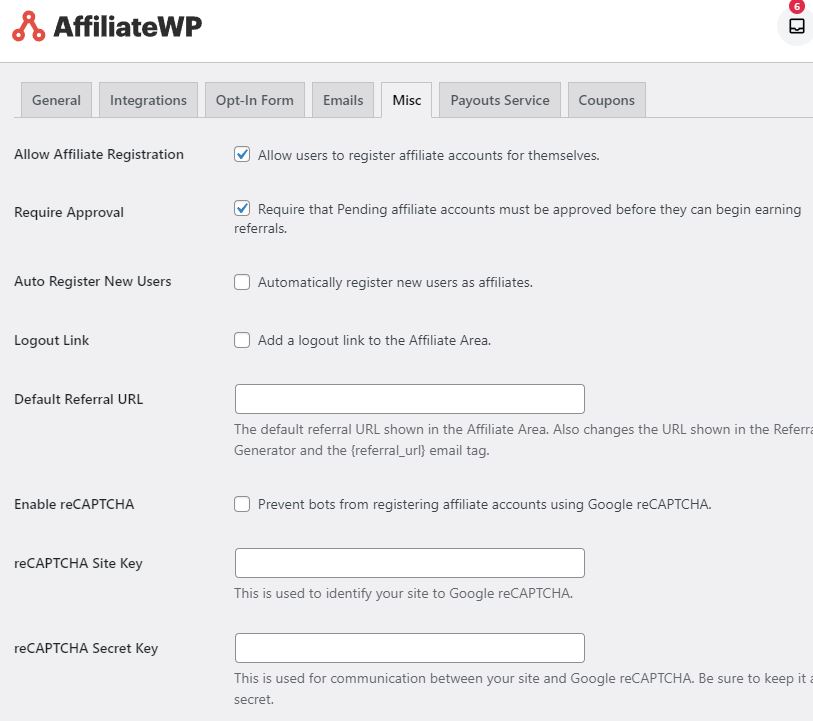
You can choose whether you want to allow users to register accounts for themselves as well as whether applications will require manual approval.
Google’s reCAPTCHA can also be implemented to prevent bot affiliate registrations.
Once you’ve taken a look over to see if you want to change anything, you can proceed to the next tab.
Step 6: Payout Service Settings
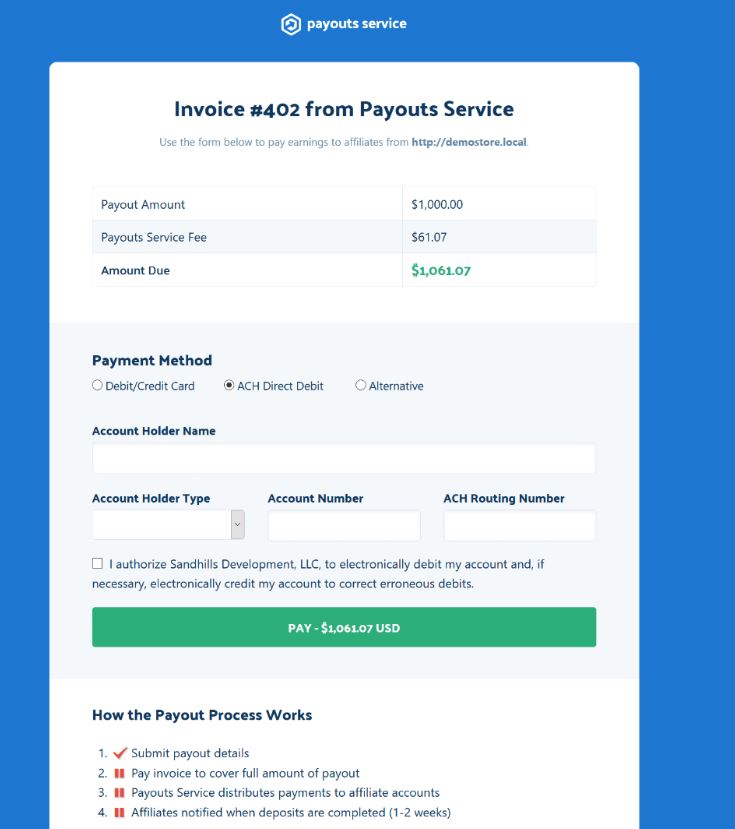
Clicking on the “Payout Service” tab presents options for integrating Payouts Service into your affiliate program.
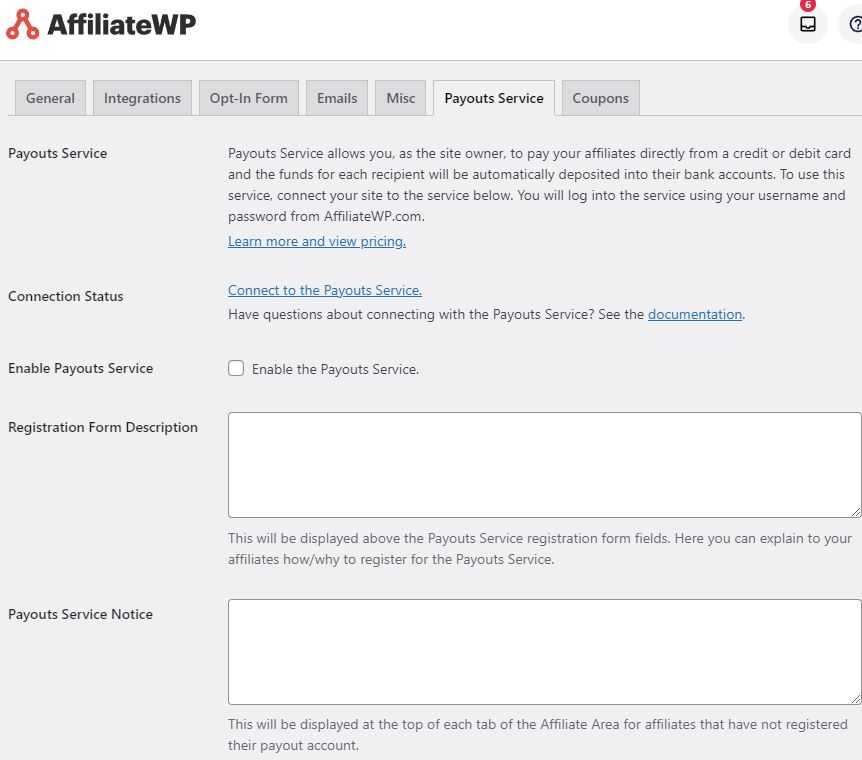
The team at AffiliateWP have created a payment service, called “Payouts Service”, to work with your affiliate program.
Integrating with WordPress dashboard, it allows you to easily pay out affiliates using your credit/debit card, ACH, SEPA, PayPal, and some others.
Normally, affiliates will only enter in their payment detail email within the affiliate dashboard.
But with this service, they can enter all of their bank details into the affiliate dashboard itself.
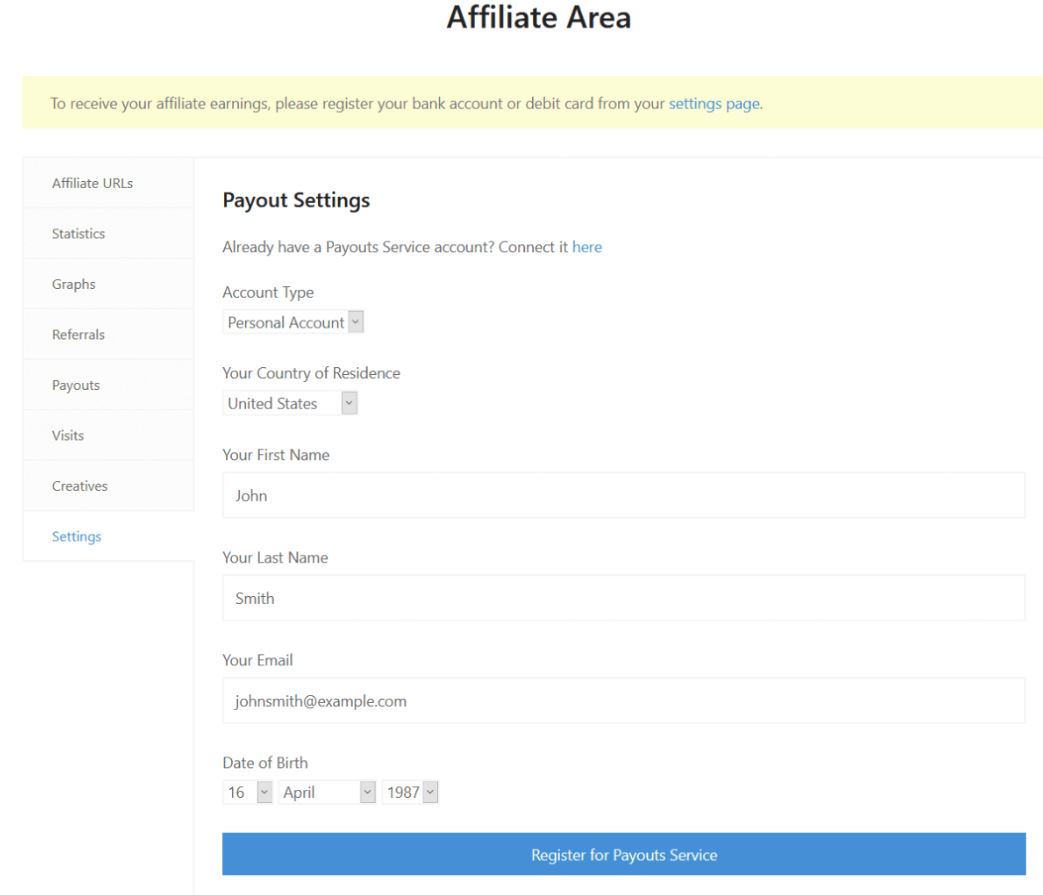 From here, you can generate invoices to yourself and affiliates, and then pay them all from within the WordPress dashboard.
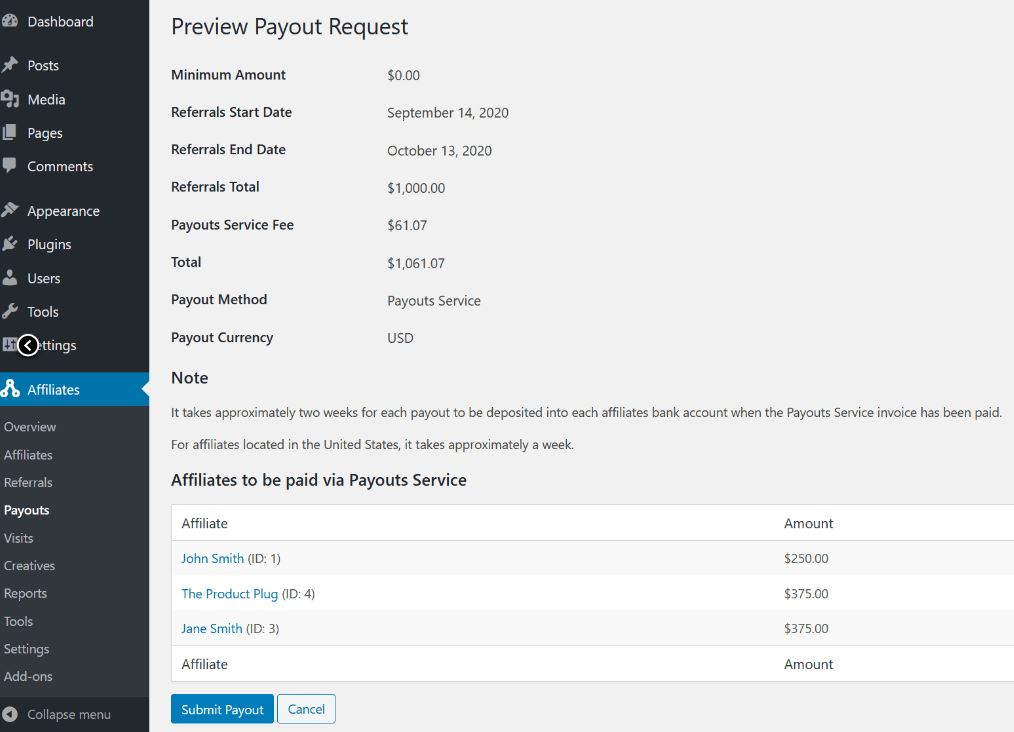
While this is convenient, there is a drawback:
Payouts Service charges a 3% service fee on top of the payment processor fees they are using to conduct the transaction on your behalf.
So, while a normal Stripe transaction would cost you 2.9% + $0.39 in processing fees, you’ll pay an additional 3% for the Payouts Service fee.
Note: They do, however, offer an option to pass these fees onto the affiliate.
So, you might just want to manually pay affiliates out yourself to save money.
Note: Purchasing AffiliateWP Pro version comes with a PayPal addon, allowing another option for convenient PayPal payments (utilizing PayPal’s REST API) from within your WP dashboard.
For my purposes, I was fine with paying affiliates out manually.
Step 7: Coupon Settings
In this section, you can enable your affiliates to additionally be able to use coupons instead of just referral links.
These coupons can then be given to an affiliate’s audience, offering them a discount.
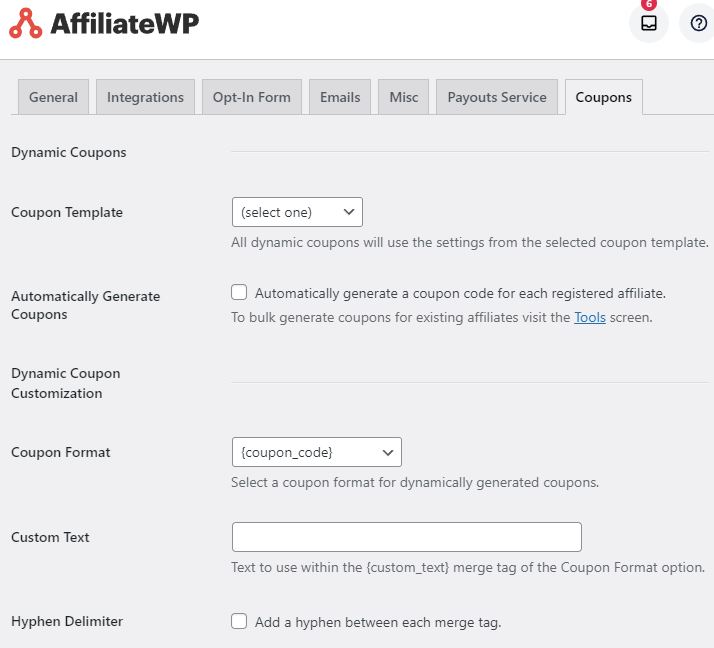
AffiliateWP lets you automatically generate dynamic coupons for pre-existing and new affiliates.
To do so, you need to first create a generic coupon as template that all dynamic coupons will use for its discount rate/conditions.
In admin side panel ->(WooCommerce’s) Marketing->Coupons section, simply create a new coupon.
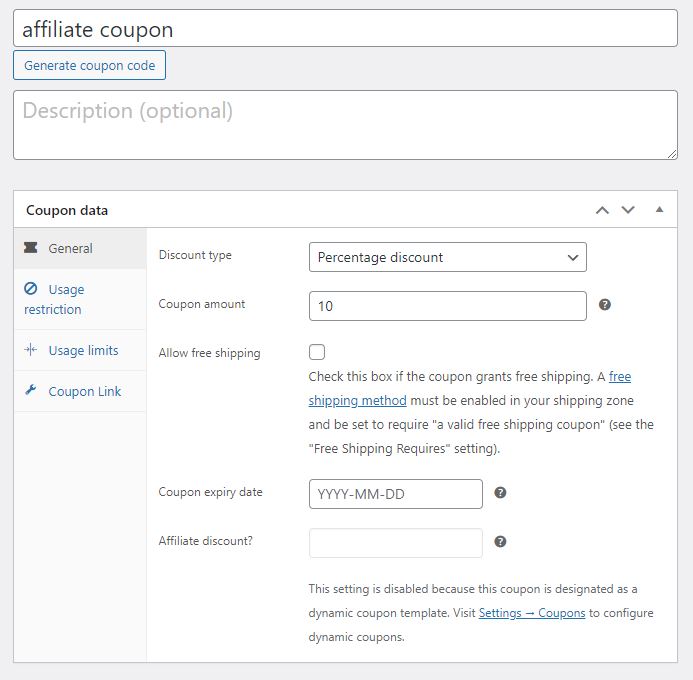
For my purposes, all I entered was a discount percentage 10%; the coupon will provide a customer with a 10% discount when used.
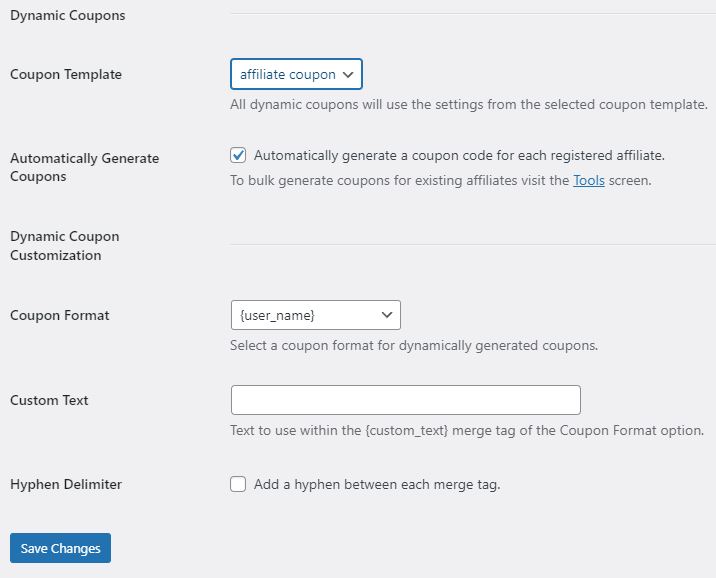
Now back in AffiliateWP->Settings, then “Coupons” tab, you can select the coupon you’ve just made.
Checking “Automatically Generate Coupons” will automatically create a personalized coupon for your affiliate when they register.
“Coupon Format” determines the format of the coupon code itself.
You can select from different formats, including having the affiliate’s username, discount amount, coupon name, custom text, etc, comprising the discount code term.

Now when an affiliate goes into their dashboard, under the coupon section, they will find a personalized coupon to provide their audience.

Step 8: Creatives
In admin side panel ->AffiliateWP->Creatives, we have the “Creatives” section.
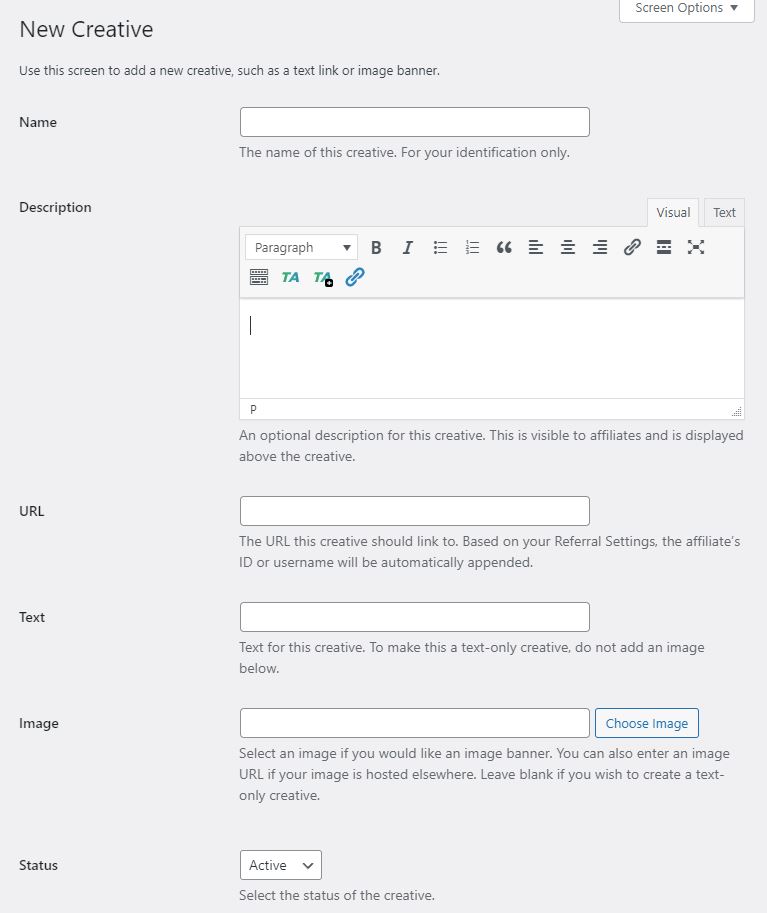
“Creatives” are pre-made banners and assets that you can give to your affiliates to better help promote your site.
These images can then be added to websites and newsletters, incentivizing clicks with their imagery.
Creating one is as simple as giving it a name and description.
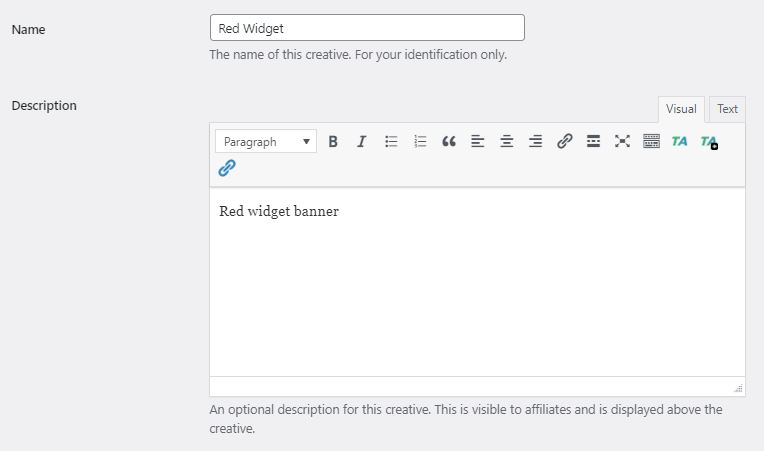
Then, adding the URL for the webpage you want the banner to take a user when clicked.

And lastly, adding the URL to the image you want to use for the banner.
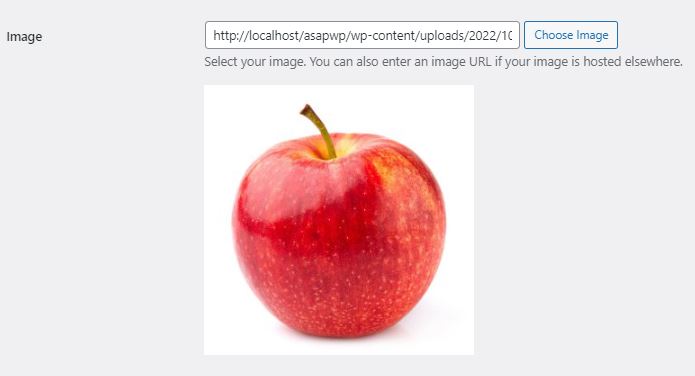
Once created, the banner will appear in the “Creatives” section within every affiliate’s dashboard, and ready for use.

Their unique referral ID will be automatically added to the link portion of the banner, ensuring each banner is associated to each affiliate that uses it.
Step 9: How the Affiliate Process Works
Now that you have a functioning affiliate program, I’ll show how the process works for a new user wanting to become an affiliate.
And all the way through to the affiliate being paid by you.
Registration/Affiliate Area
The affiliate-to-be will go to the affiliate area page located on your website.
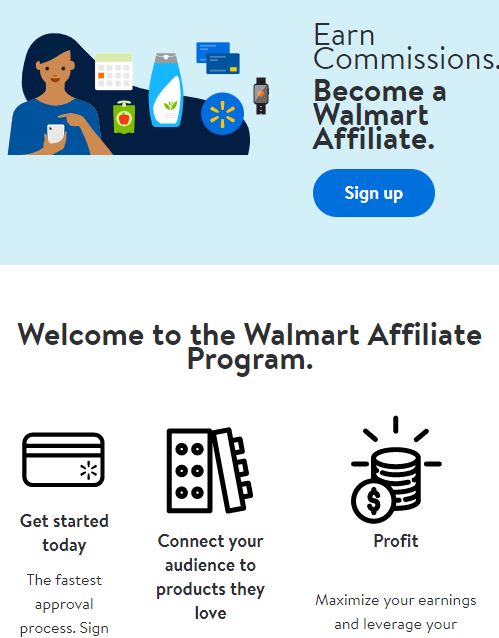
Although typically before this, you will have created an informational page describing your affiliate program; usually, with a button somewhere on the page leading to the affiliate area/sign up.
For an example, here’s Walmart’s introductory page for new affiliates:
The actual page where people can register to become affiliates as well as for returning affiliates to login is located at:
https://yourwebsite.com/affiliate-area
Here there will be a registration form with a login form underneath it.
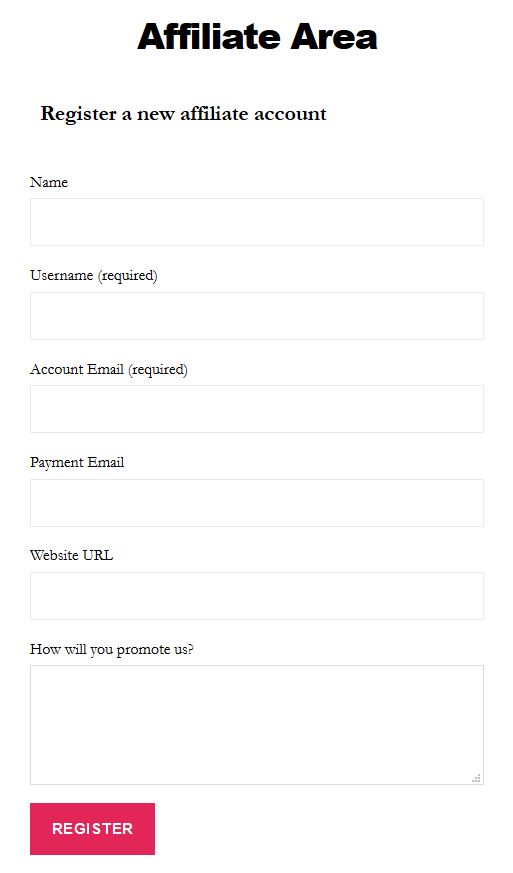
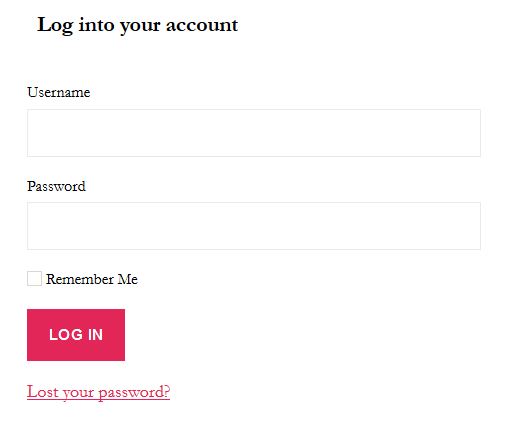 The styling of these forms can always be customized with CSS but will default to the styling of your theme.
First time affiliates will fill out the registration form.
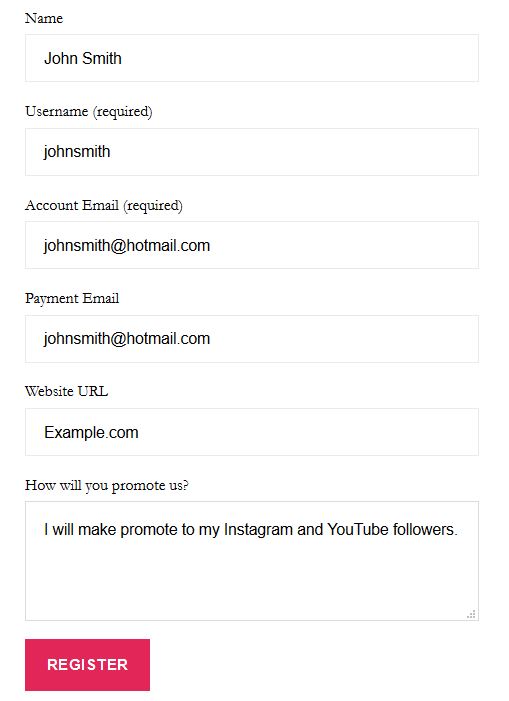
Once the form is submitted, the user will see the registration is pending (if you’ve kept registrations to require manual approval).
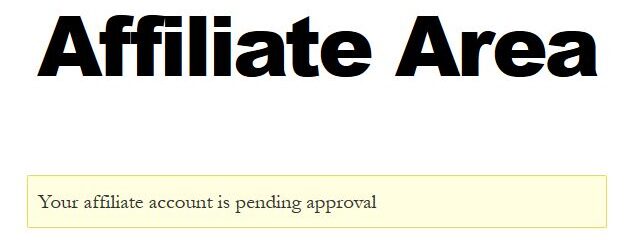
AffiliateWP will automatically send the potential affiliate an email letting them know the registration is pending approval.

Additionally, it will send you an email letting you know that an affiliate has registered and needs your attention.
In dashboard admin side panel ->AffiliateWP->Affiliates, you can see a list of current and pending affiliates.

In this case, John Smith is waiting for approval.
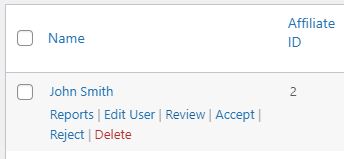
Clicking “Accept” will accept the affiliate to your affiliate program.
But first I want to click “Review” to see the affiliate’s application from the registration form.
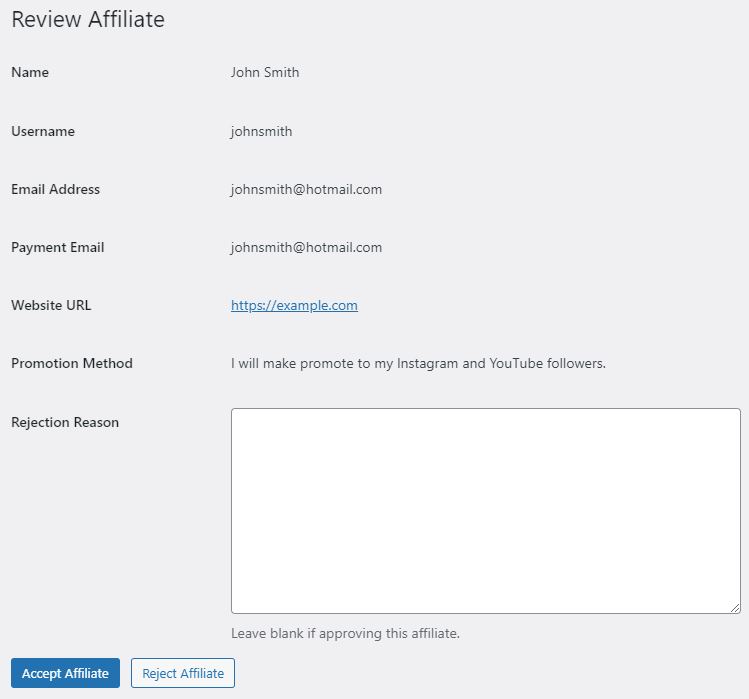
If everything looks good, the affiliate can be approved; or alternatively, rejected.
In either case, the affiliate will receive an email letting them know they were approved or rejected.
Affiliate Dashboard/Affiliate Area
Now we’ll switch over to the affiliate’s perspective. In this case, the affiliate was approved.
When the affiliate goes to:
https://yourwebsite.com/affiliate-area
They will login into their account, presenting them with their new affiliate dashboard.
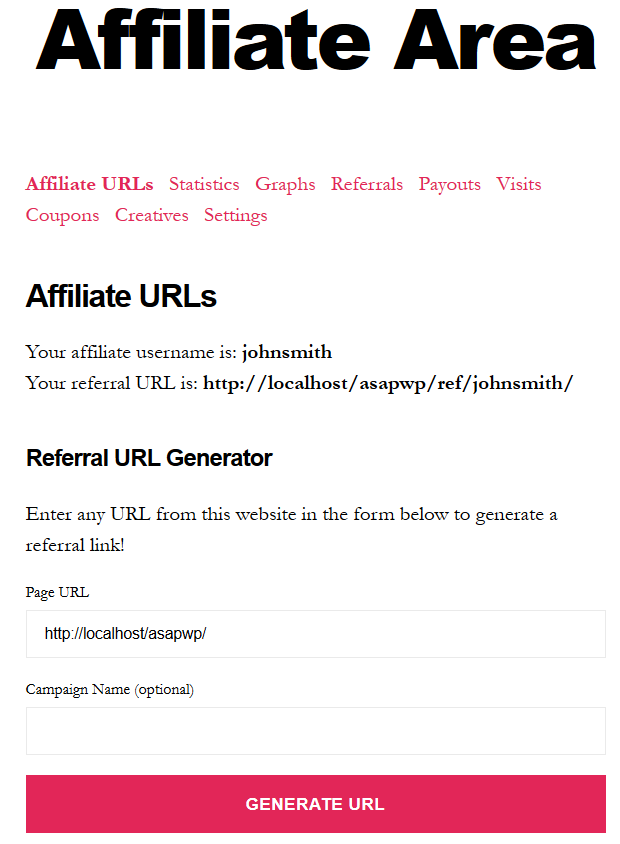
The affiliate dashboard inherits styling from your theme but can be customized with CSS.
From “Affiliate URLs” section, your affiliates can generate their referral links directing to any particular webpage on your site.
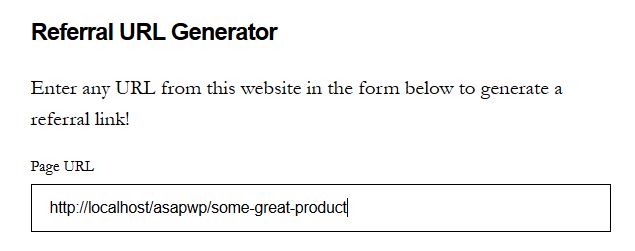
Providing them the affiliate link to that page.

In other sections of the affiliate dashboard, affiliates can see their:
- Affiliate link performance, such as clicks, visits, conversions, etc
- Graphs that show referral earning trends over timeframe
- Payouts, showing their previously paid earnings and to-be-paid earnings
- Coupons, displaying their personalized affiliate coupons
- Creatives, where they can choose images and banners to embed and share containing their affiliate links
- Settings to turn off email notifications and change payment email
Paying Affiliates
Once a customer clicks an affiliate’s referral URL and/or uses a coupon and a successful sale occurs, the affiliate will be credited.
On the affiliates end, it will reflect in their affiliate dashboard, showing a sale has occurred and an unpaid balance exists.
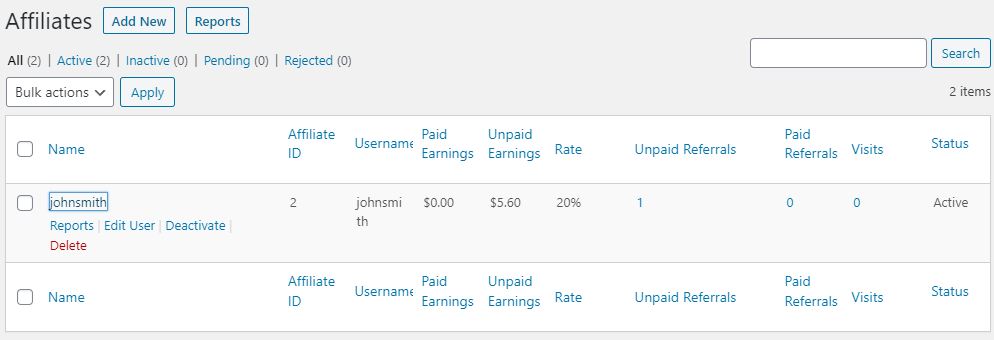
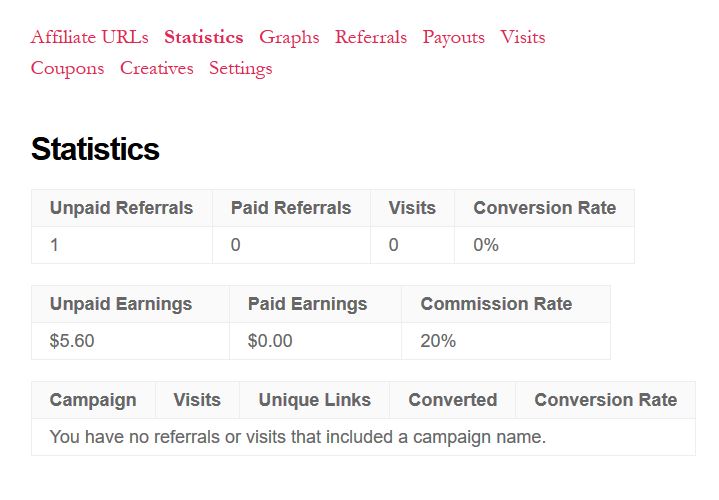 On your end, in AffiliateWP->Referrals, you will see the sale and the commission the affiliate earned.

The status will show as “Unpaid”. Once you’ve paid the affiliate, you can simply select “Mark as Paid”.
You can also go into AffiliateWP->Affiliates to see an overview of all affiliates and their current unpaid balance and paid earnings to date.
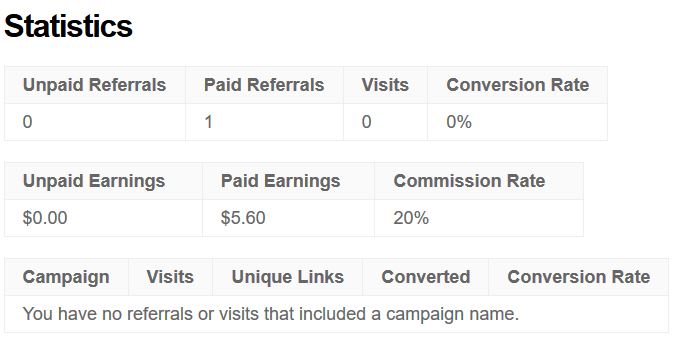
Once an affiliate is paid, they will see it reflected in a few places in their affiliate dashboard, such as the “Statistics”, “Referrals”, and “Payouts” areas.

Conclusion
Choosing to create and run your own affiliate program will save you money and give you finer control.
It used to be much harder to have your own affiliate program, but now it’s very easy to set up and operate.
AffiliateWP is a complete affiliate program, with an easy set up and enough features for most people’s needs.
Different WordPress plugins can also integrate with AffiliateWP, offering even more options.
Hopefully this guide has showed you how to create your own affiliate program in WordPress.
