
Are you looking for how to properly install and set up Yoast SEO for WordPress?
Yoast SEO is one of the most popular SEO plugins for WordPress.
It is easy to set up; however, there are some features that are crucial to implement properly for the successful SEO of your website.
In this easy-to-follow guide, I’ll cover how you can properly configure Yoast SEO for the continued success of your WordPress website.
Why You Should Use an SEO Plugin and What Does Yoast Do?
Can you create a website without using an SEO plugin?
The answer is yes.
But SEO plugins like Yoast offer a variety of features that make implementing search engine optimization easier for you.
This includes:
- Setting your SEO titles and meta descriptions
- Analysis for improving the SEO, keyword usage, and readability of your text
- A preview of how your post will appear in the Google search engine results
- Marking “cornerstone content” for better site structure and organization
- A sitemap to help search engines better navigate and catalogue your website
- An internal link counter, providing a count of internal links both on and directed to a particular page/post
- Ability to no-index post, pages, archives, and taxonomies
In my opinion, the most useful features have always been how easily you can set search engine titles and descriptions, preview your post’s search result in Google, and no-index certain parts of your website as needed.
The sitemap is a nice addition as well.
Installing and Configuring Yoast SEO
Step 1: Install and Activate Yoast SEO
The first step involves downloading and installing the Yoast SEO plugin.
Step 2: Features
After installation and activation of the plugin, the “Yoast SEO” menu will now appear in the admin sidebar panel.
Head to Yoast SEO->General and click on the “Features” tab.
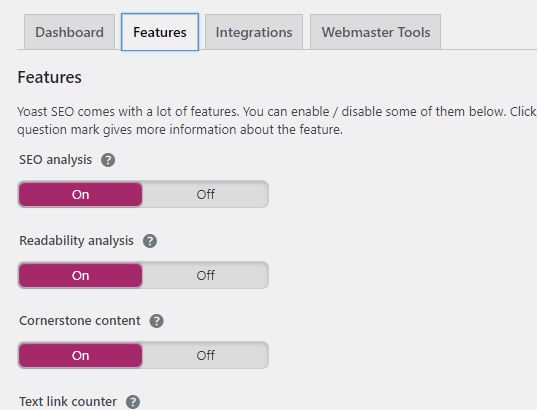
Here we’re presented with a lot of options to enable or disable:
- SEO analysis: suggestions to improve the SEO of your text
- Readability analysis: suggestions to improve formatting/structure and readability/flow of your text
- Cornerstone content: mark and filter your most important/comprehensive posts
- Text link counter: counts the internal links both in and pointed to a particular post
- Insights: additional analysis and suggestions about the content of a particular post
- XML sitemaps: a sort of directory/map of your site and its structure and contents, to help Google with crawling and indexing
- Admin bar menu: quick access to some features in the admin bar
- Security no advanced or schema settings: restricts some Yoast features from being accessed by non-admins for extra security
- Usage tracking: sends some of your site data to Yoast to improve their plugin
- REST API: fetch SEO data for a particular post or page; useful for headless WordPress sites
- Enhanced Slack sharing: adds an author byline and reading time estimate to an article’s snippet when shared on Slack.
You are free to enable whatever settings you like and think that you’ll use.
Personally, I disable most options, as I do not use any of the SEO or readability analysis tools.
However, if you are new, they can be of help, providing a good start on better article structuring and general SEO guidelines.
Give them a try and disable them if you don’t like them.
At a minimum, I recommend you keep “XML sitemaps” on if you’re not using another sitemap.
Additionally, keep “Security: no advanced schema settings” on unless you want authors to be able to be able set schema, no-index, and change canonical on posts.
You can turn off REST API if you’re not building a headless WordPress site/don’t know what this is.
Step 3: Webmaster Tools
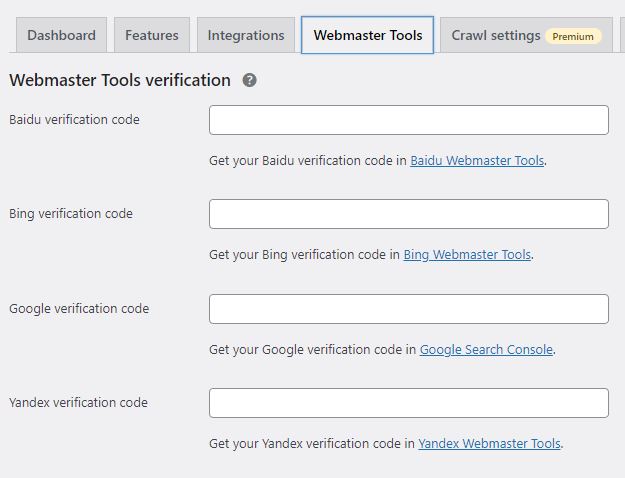
Some of the top search engines have webmaster tools that you can use, such as Google Search Console.
They require verification of site ownership.
Here you can enter that verification code they give you into the associated field, which will easily enable you to verify your site.
This is optional and/or can be ignored if you’re already verified.
Step 4: Integrations
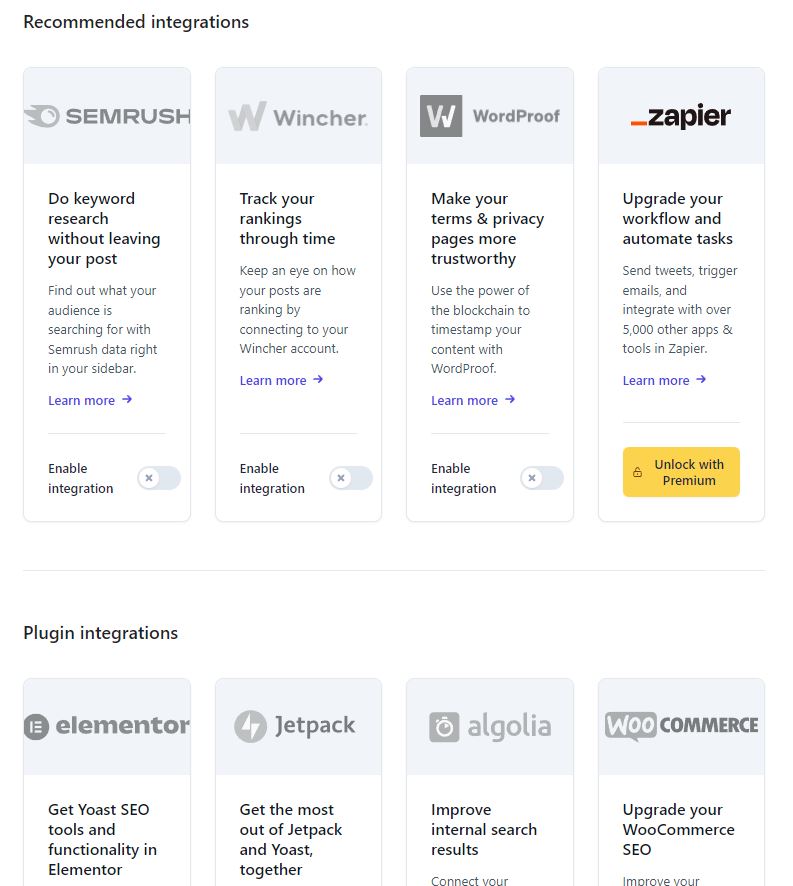
Yoast offers several integrations for different services and plugins to help better improve your SEO content and workflow.
Some of these integrations will be dependent on whether you have the associated plugin installed.
Others are paid services.
The SEM Rush integration might be useful to you, as its one of the top SEO tools on the market.
Integrated with Yoast, within post editor, you can search for similar/additional keywords related to your article’s target keyword and can even get search volume and other insights regarding that keyword.
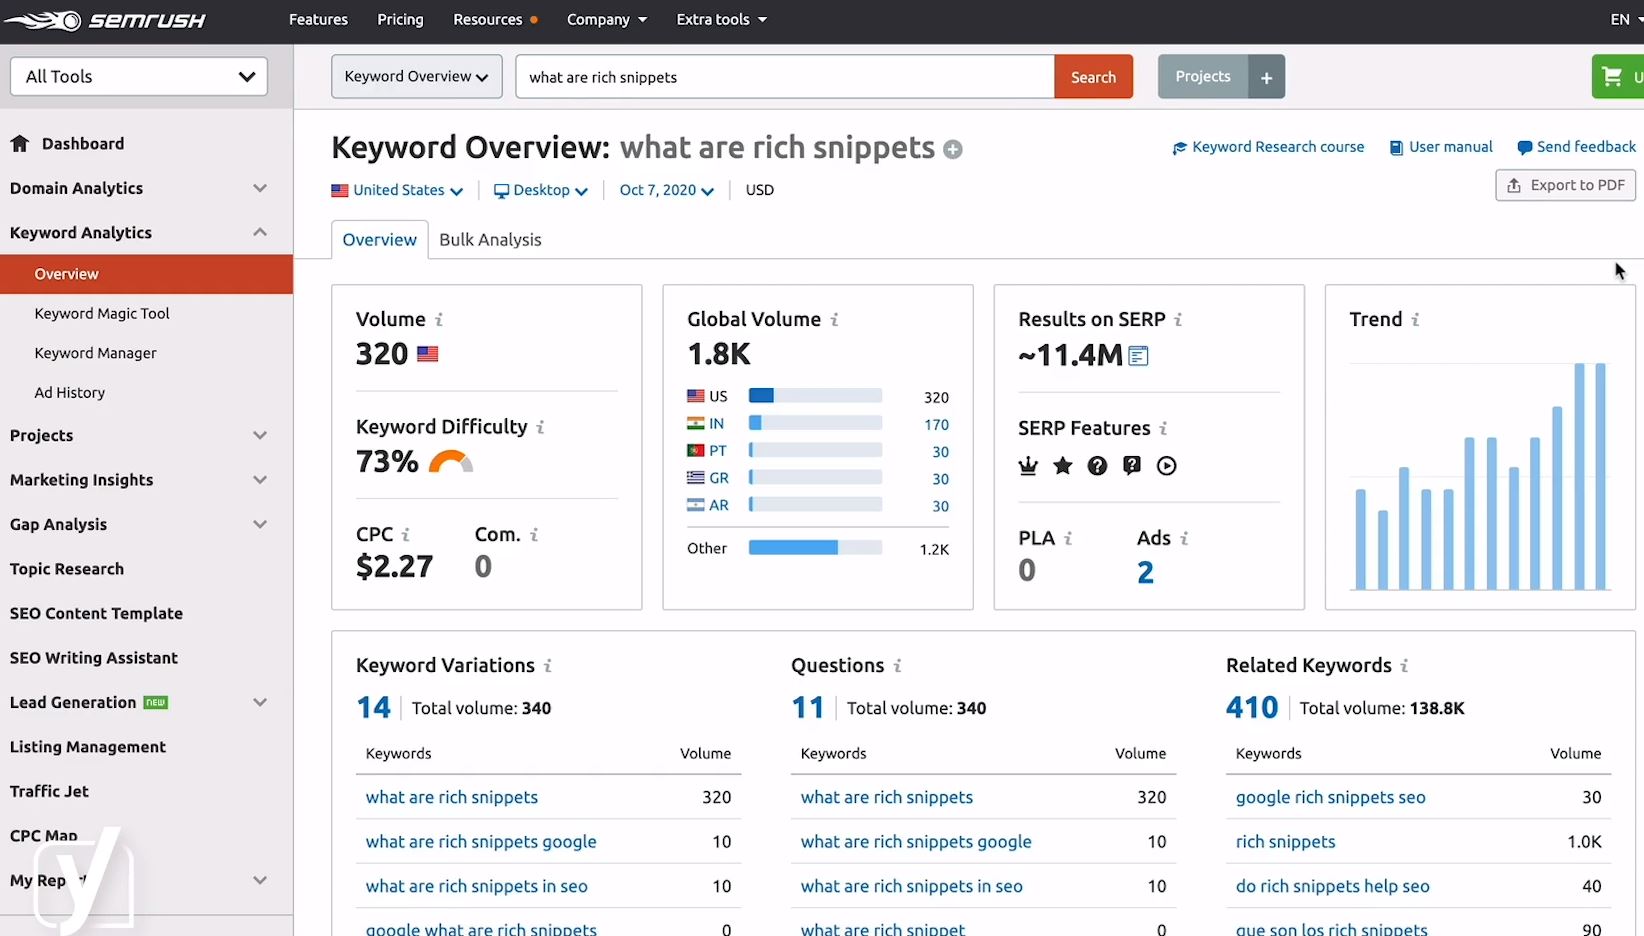
You’ll need to create a SEM Rush account and link it with Yoast. As a free user, you can make 10 keyword requests per day.
Step 5: Search Appearance
A lot of important settings are in Search Appearance, so we’ll be taking this step-by-step.
Title Separator
The title separator is the default symbol that will act as the separator between the post title and another variable, such as the site name.
It will be visible in your SEO titles in search engines.

For example, in the Google search result, we can see Best Buy’s search result listing:
 The first part of that (“Firestick Tv”) is the post title, followed by a hyphen, and then the site title (“Best Buy”).
The hyphen is the separator we are talking about.
Yoast.com has some of their Google listings use a dot instead, for instance:

I use the hyphen. And most sites seem to use a hyphen; it’s also the default.
Probably, the dot (•) and vertical bar (|) are the second most popular.
Note: you have the option to overwrite any default titles (including the separator) when editing any individual post/page itself within the Yoast “Google preview” box.
Homepage Posts & Pages
In this section, you can enter the title and meta description for your homepage.
You might see “You can determine the title and description for the homepage by editing the homepage itself.”.
This means your homepage is set to show a static page, where you can edit the title and meta description within post editor for that particular page.
Otherwise, if your homepage, under admin side panel Settings->Reading is set to display “Your latest posts”, you will be able to enter those details here, since your homepage is set to a blog feed.
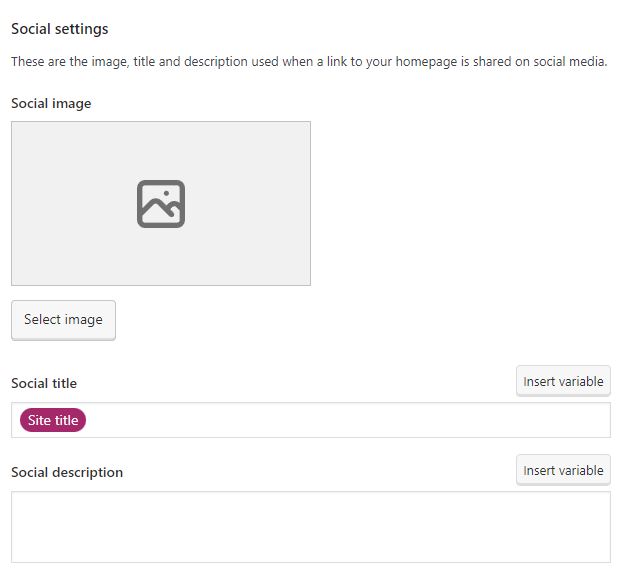
Social Settings
Here you can set what the image, title, and description will be like when someone shares your homepage on social media.
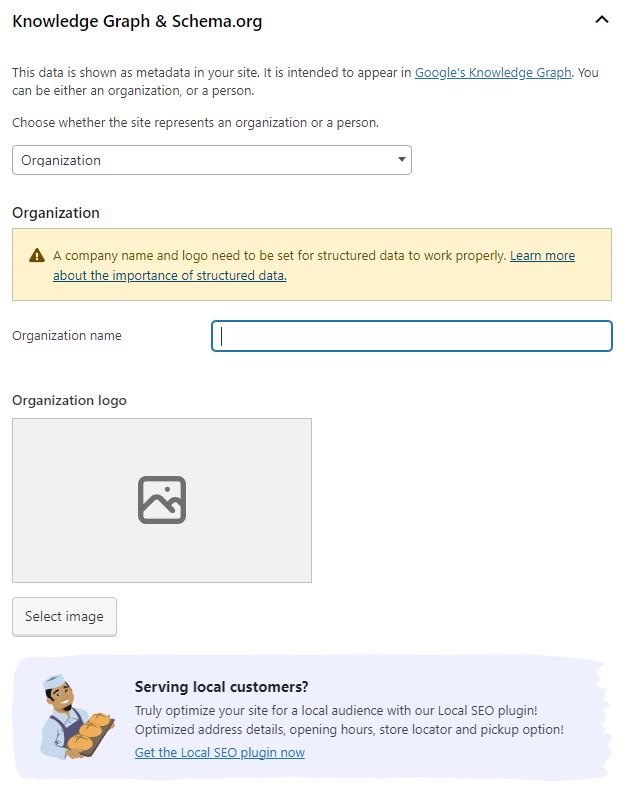
Knowledge Graph & Schema.org
Here you can choose whether your website represents an organization or an individual.
You can also add a logo that represents your avatar/organization.
Content Types
Here we have options for both “Single post settings” and “Single page settings”.
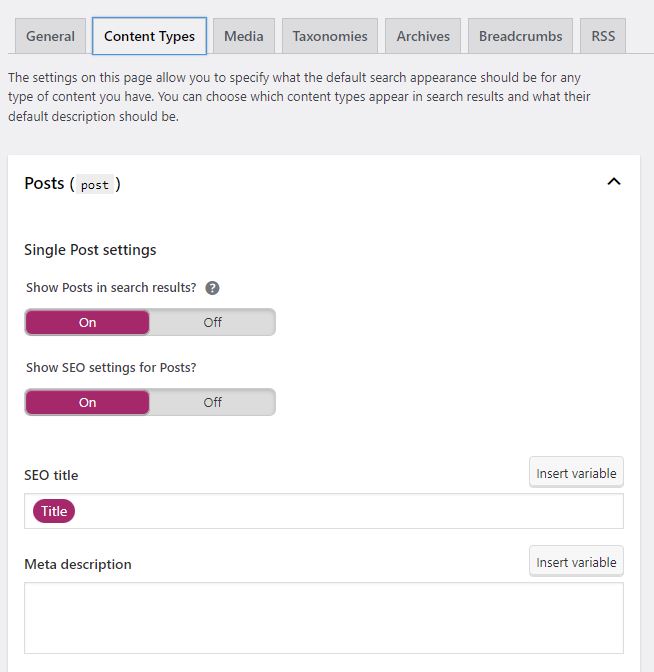
These settings will apply to all posts and pages on your website.
The first option is “Show posts/pages in search results”.
You really want to keep these both as “On”; otherwise, your posts and pages won’t appear in Google search results.
Keep “Show SEO settings for Posts/Pages” also as “On”, which outputs the Yoast SEO options for post/pages in post editor.
What you enter in the “SEO Title” field will create the default structure for how all post/page SEO titles appear in Google search results.
Note: you have the option to overwrite any default titles when editing any individual post/page itself within the Yoast “Google preview” box.
I prefer to keep this just as [Title] variable, which defaults to using the post title.
Another popular option is [Title] [Seperator] [Site Title].
If you don’t manually type the SEO title for each individual page/post you create, it will default to the structure you enter here.
It’s a good idea to leave the Meta description field blank.
By default, this will allow Google to generate a meta description from parts of your text.
Generally, you should also be writing unique meta descriptions from within each posts/page yourself, using the Yoast “Google preview” section, to better incentivize users to click your Google search result.
Media
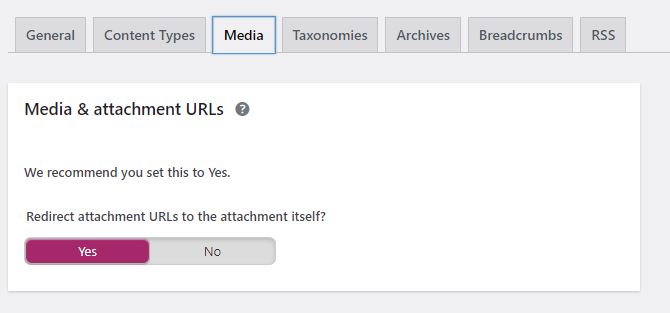
You can keep “Redirect attachment URLs to the attachment itself?” as “Yes”.
When you upload media, WordPress creates an attachment page along with the attached file.
Attachment pages are generally going to be pointless for you — a dedicated page consisting of the image and some of its properties (e.g. image title).
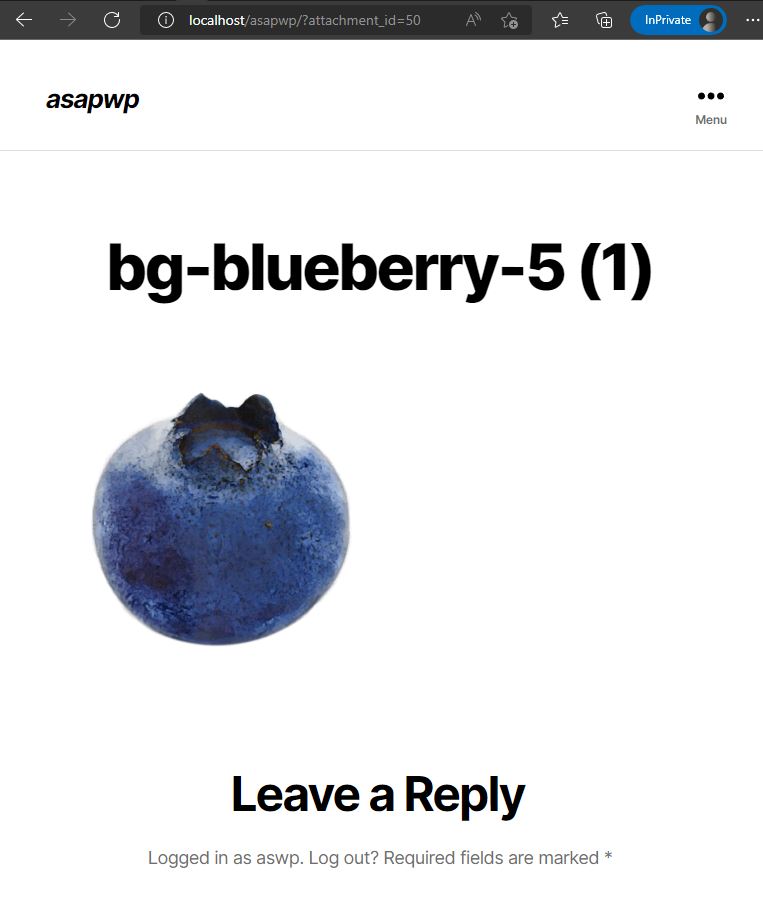
These are low-quality pages that you’re better off redirecting directly to the image itself.
Taxonomies
Here you can set the default SEO titles for the various taxonomies on your website, just as you did for post/pages.
I recommend keeping “Meta description” field blank, as you did with post/pages.
If you’re also using WooCommerce, you’ll find even more taxonomies listed here.
Something you’re going to want to think about in this section is which taxonomies you want to show in search results.
Setting this to “Off” technically means you are applying no-index to it, which instructs Google/other search engines to not index it in its search results.
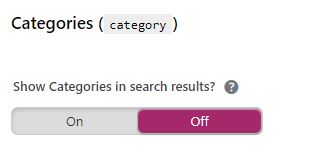
Many of these taxonomies create excess pages, in the form of lists of content excerpts (like a blog feed).
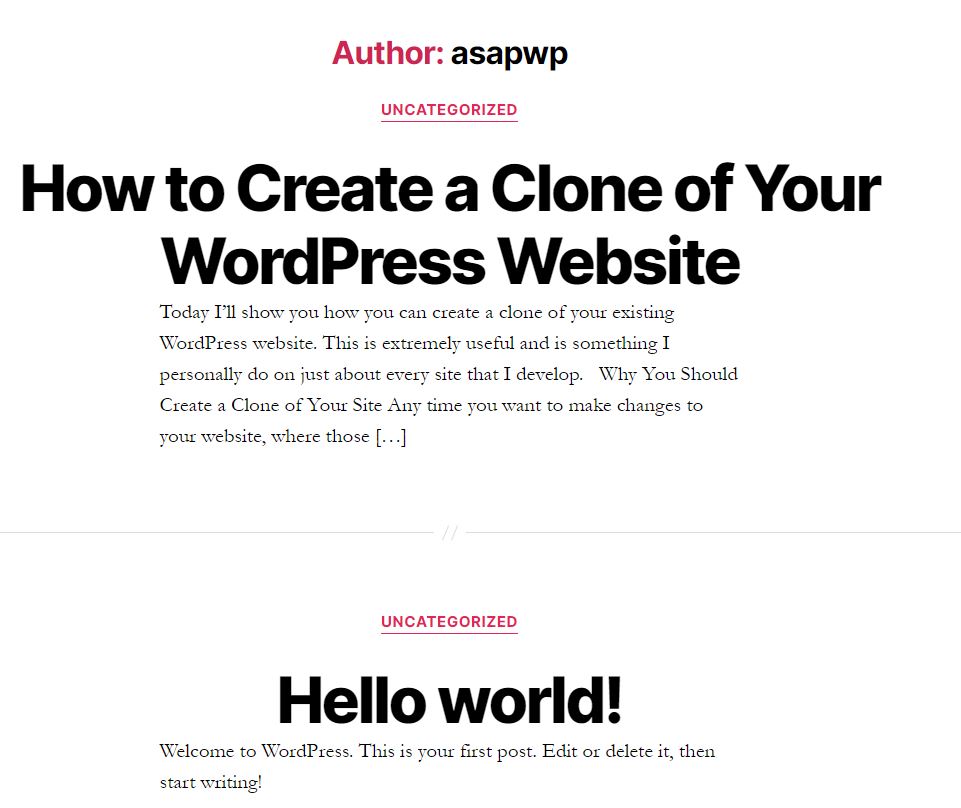
For example, if you assign a post to a tag, an excerpt of that post is now shown on that tag’s page:
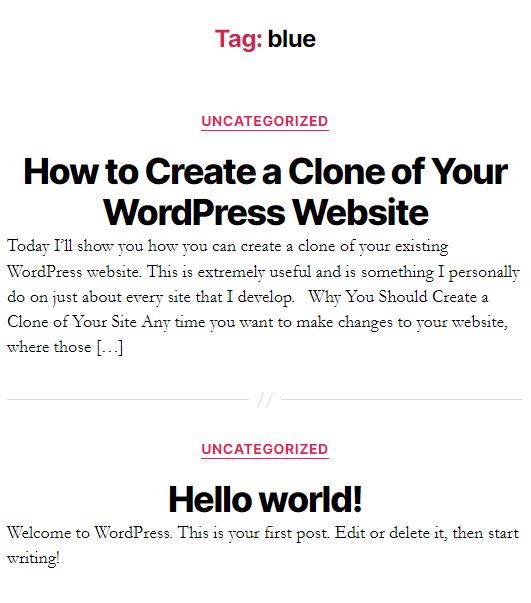
For every new tag created, a new tag taxonomy page is created containing all of the posts you’ve assigned its tag to.
If you assign multiple tags to any given post, that post will then appear on multiple different tag pages/feeds.
This creates a lot of redundant, thin, and duplicate content. It also adds site bloat.
Generally, you want to rank individual posts and pages, not lists of posts, and especially not the same post excerpt across several different lists.
For this reason, I set most taxonomies to show in search results as “Off”, except those which I specifically want to rank in Google.
For me, this means I have tags, formats, product tags, and product shipping class set to “Off”/no-index.
Generally, choose to use either Categories or Tags on your site, as they are very similar to each other.
Personally, I virtually never use tags because categories are enough for me for content organization.
If you’re running a WooCommerce store, you almost always want your product category pages to rank, so they should be set to “On”.

For blogs, you need to decide whether you want to rank your category pages or not.
Thin, poorly optimized category pages you might not care to rank, whereas strategically planned, text-rich category pages acting as content/topic hubs can be a valuable asset to your website and SEO efforts.
Here are some opinions on category indexing that might help from SEJ and RelayContent.
In the next section, you’ll see “Category URLs: Remove the category prefix?”.
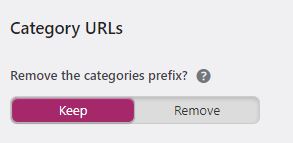
If you set this to “Remove” it will strip the /category/ base slug from all category URLs.
For example, instead of “website.com/category/blue-widgets/” it would be “website.com/blue-widgets/.
If you want to rank your category pages, you can consider if you want to set this this option to “Remove”, which will produce shorter URLs.
Archives
In the archive settings, we face the same issues that we did with taxonomies.
Namely, that archive pages create more lists of post excerpts, leading to more of the same thin and duplicate content.
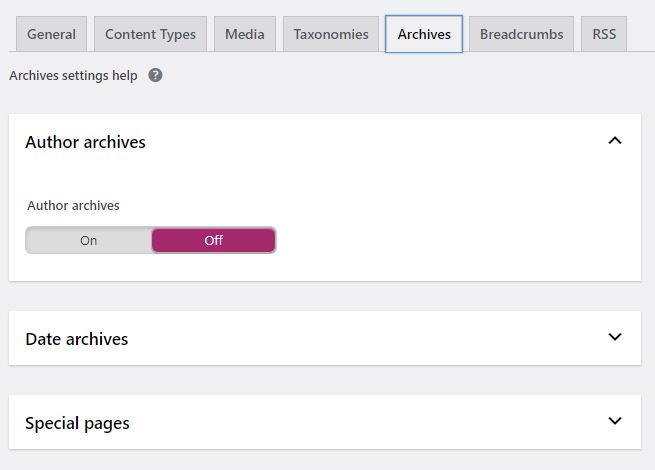
For example, for every author that publishes posts, a dedicated author page will be created with a link to and excerpt of their posts.
If you are the sole author on your site, your author archive page will simply be a duplicate of your main blog page/feed.
Personally, I set both “Author Archives” and “Data Archives” to “Off” for showing in search results.
However, you may want author archives to be shown in search results; for example, if you want exposure for the postings of particular authors.
Search Engine Journal has a write-up about author archives related to no-indexing, ranking, and E-A-T that might be useful.
Note: a simple way to check which content types and taxonomies on your website are currently set to be indexed, as well as to see an overview of the structure of your site, is to view your sitemap at “yourwebsite.com/sitemap.xml”.
Breadcrumbs
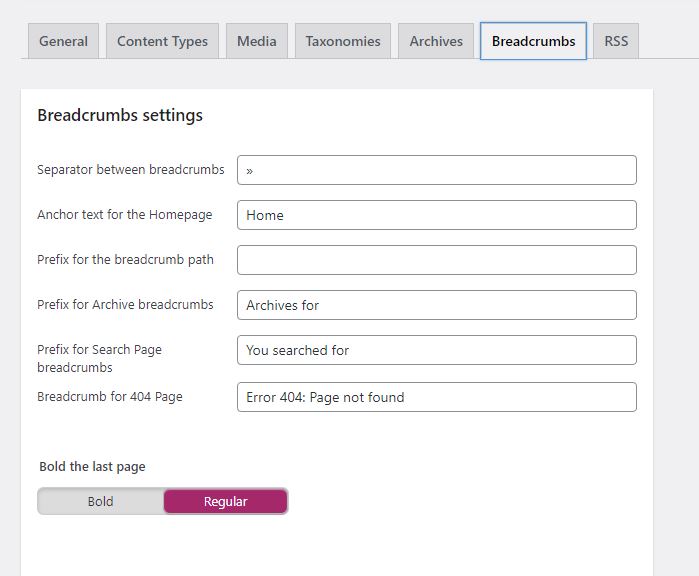
Breadcrumbs are a navigational text path letting you know where you are on a site.
Yoast allows you to add breadcrumbs to your site, both site-wide and manually by inserting them into a post/page with a block or shortcode.
To add a breadcrumb with shortcode, you simply add [wpseo_breadcrumb] within a post.
The result will look something like this:
![]()
You can change some settings to determine what taxonomy or content type you’d like to be shown in the navigational path, or none at all.
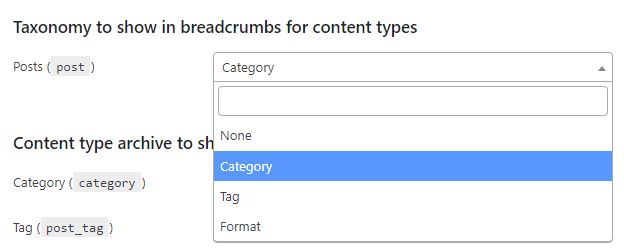
For example, for the section “Taxonomy to show in breadcrumbs for content types” for “Posts”, if “Category” is chosen, the breadcrumb will output the category the post belongs to in the navigational path when used on single posts.
To add breadcrumbs site-wide, you have to make some edits to your theme files, which Yoast has a guide for.
RSS
Content scrapers are known to scrape your content without permission and post it elsewhere.
Here Yoast defaults to adding a link back to your blog/the original post after each post in your RSS feed, helping to indicate to Google that you are the original source.
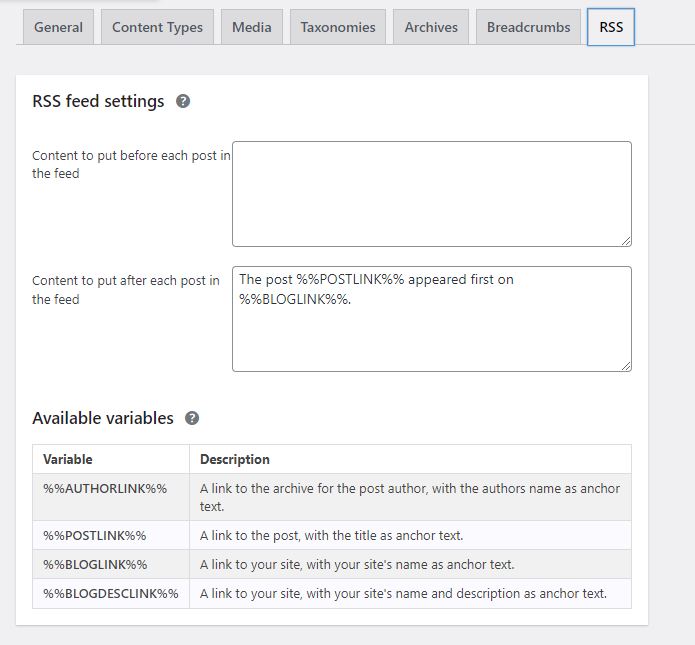
If you want to modify it, there are additional variables that can be used, such as author link and blog description link.
Step 6: Social
Accounts
Here you can add your social media pages associated with your website.
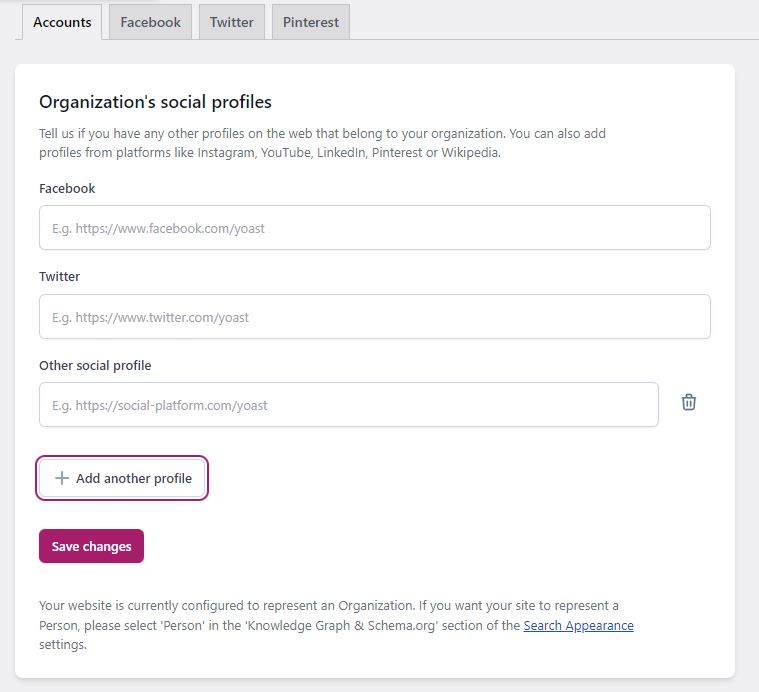
Facebook and Twitter fields exist by default; however, you can add more fields and enter in your various other social media pages, such as YouTube, Instagram, etc.
By default, “Open Graph meta data” should be set to “On”.
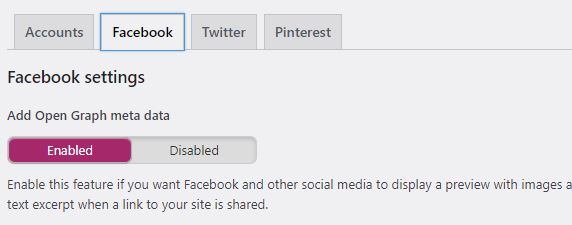
When sharing a post on your website to Facebook, this will allow for a preview of the post, containing a text excerpt and image from it to be shown/shared.
For the “Default Image” section, you may upload an image here.
In the event that a post is shared that contains no images, it will use this default image.
For this reason, you’ll want to use an image that could apply to various different posts regardless of topic, such as your brand logo.
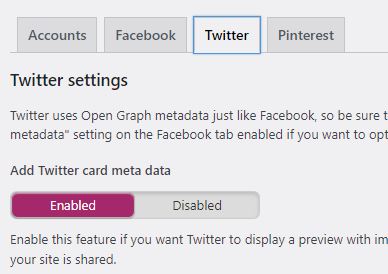
Just like with Facebook, Twitter also uses open graph data to show text excerpt and an image when sharing a post on their social network.
Again, Pinterest uses open graph data like Facebook.
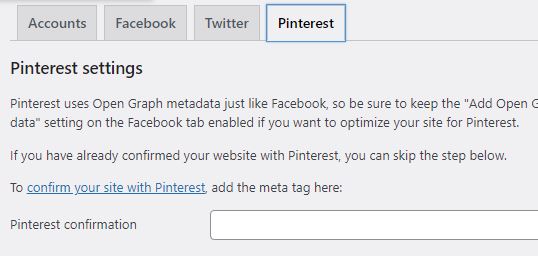
You’ll notice a verification field here; simply logging into your Pinterest account->settings and verifying your website will provide you with a meta tag to be entered here, if you have not already done so.
Step 7: Tools
In this section, Yoast includes some additional tools:
Import and Export
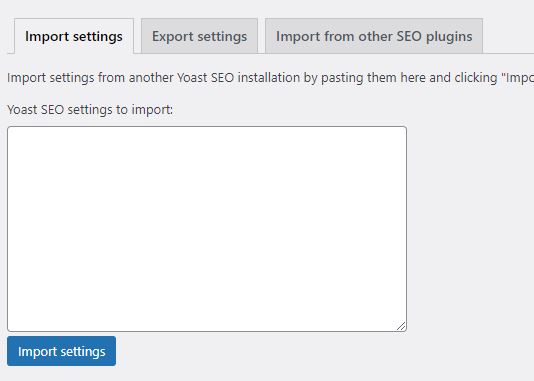
With this tool you can:
- Import Yoast SEO settings from another installation of Yoast
- Export your Yoast settings for use on another installation of Yoast
- Import data from another SEO plugin; when you want to switch from a pre-existing SEO plugin on your website to Yoast
File editor
In the robots.txt section, Yoast allows you to create and/or edit your robots.txt file.
Robots.txt file is often used to discourage search engines from crawling certain parts of your website if needed or blocking bots altogether.
In the .htaccess section, you can edit your .htaccess file from within the WordPress admin area; traditionally you would do this from File Manager/FTP.
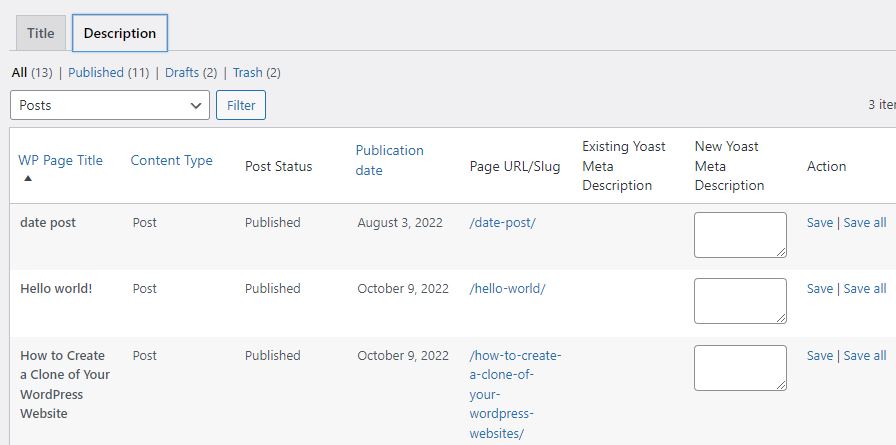
Bulk editor
This is a convenient bulk editor that gives you an overview look at every post/page on your site, published or in draft.

You can quickly change both the SEO title and meta description of each post/page that will appear in the Google search results.
Otherwise, you would have to do this individually when editing a post/page.
Changing views by pressing the “Description” tab will allow you to edit the meta descriptions of individual posts.
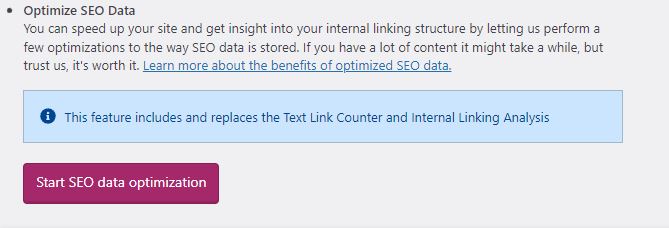
Optimize SEO Data
This feature optimizes metadata fetching for search engines, provides better insights for internal linking and site structure, and potentially improves page loading speed.
Step 8: Premium
For paid users, Yoast offers a variety of premium features.
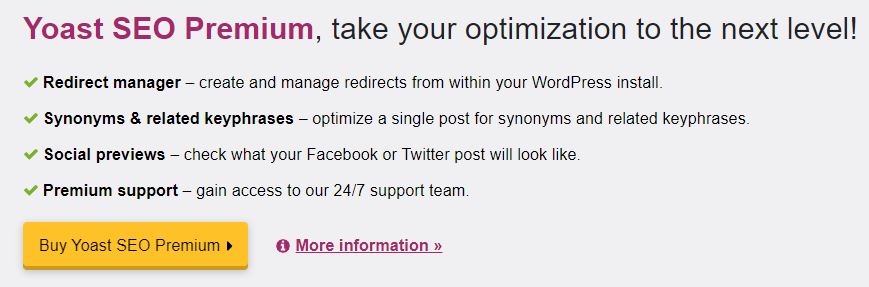
This includes:
- Redirect manager: create and manage redirects from within WordPress admin
- Synonyms & related keyphrases: helps to optimize posts for synonyms and related keywords
- Social previews: check what your Facebook and Twitter posts will look like
- Premium support: access to their 24/7 support team
Note: if you need to set up redirects, you don’t need Yoast premium and can simply use a free plugin like Redirection, .htaccess, or the redirection tool in cPanel.
Yoast in Action: Using Yoast SEO
Here are some practical use cases for how you can use Yoast to better optimize your posts, pages, categories, and WooCommerce products and product categories for SEO.
Step 1: Optimizing Posts and Pages with Yoast SEO
When editing a post/page, we can find the Yoast SEO section underneath the post editor.
There is quite a bit going on here, so we’ll start with the “SEO” tab.
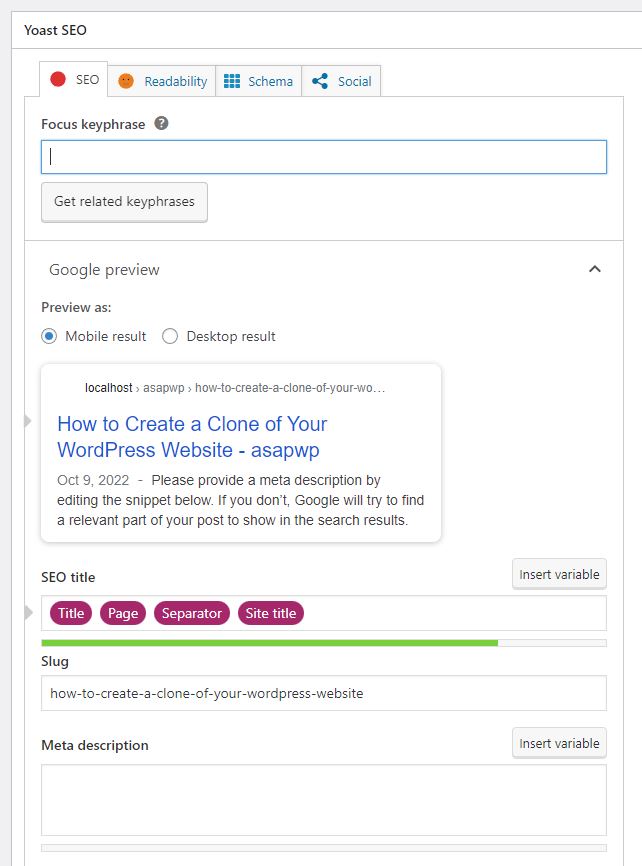
Focus Keyword
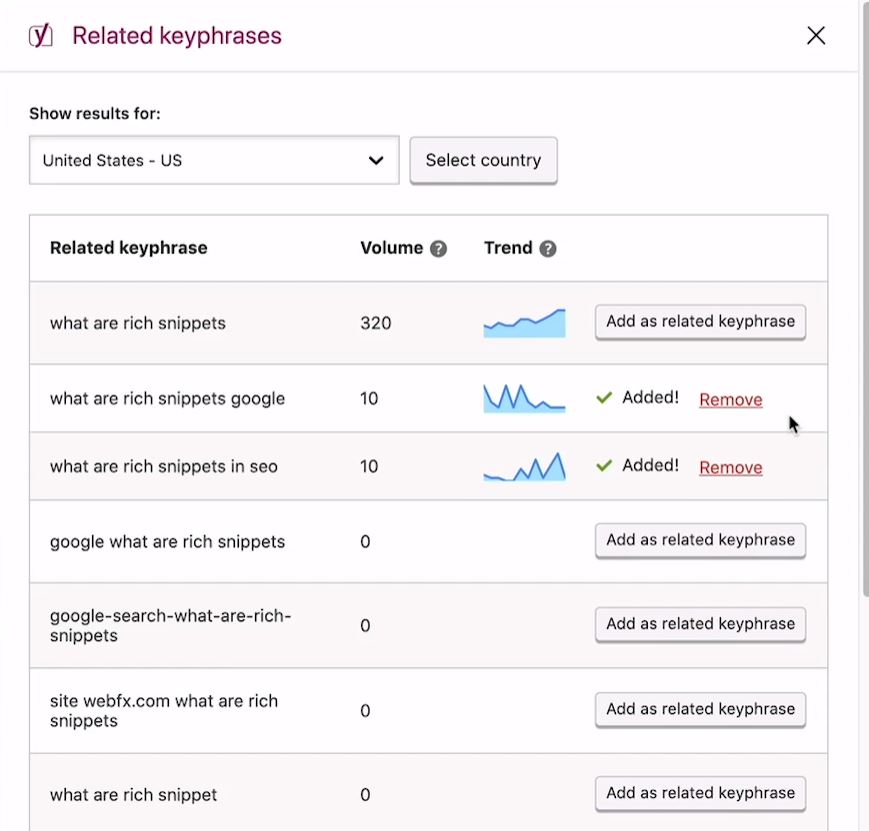
The first feature we’re presented with is the “Focus keyphrase” field.
You can enter your target keyword in here and press “Get related keyphrases” to find search volume and similar keywords with SEM Rush integration.
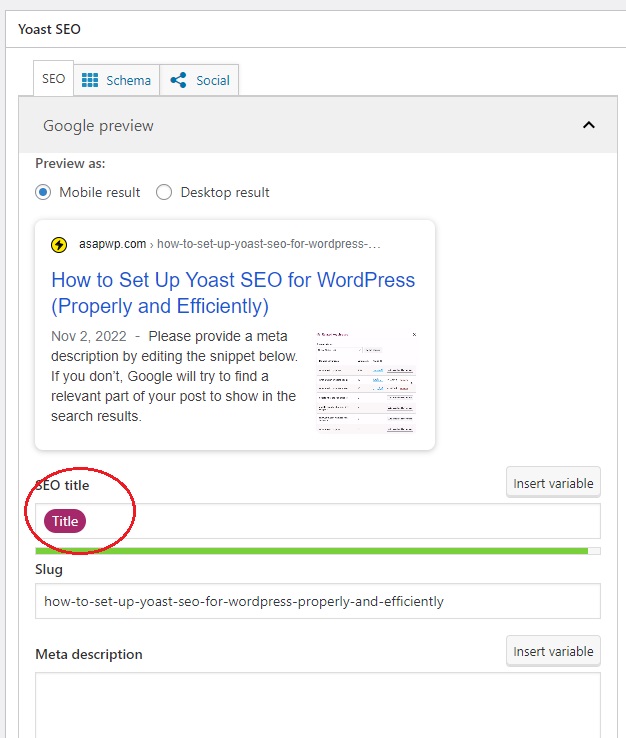
Google preview
Next is the “Google preview” section, where we can see how the post will look in the Google search results on both mobile and desktop.
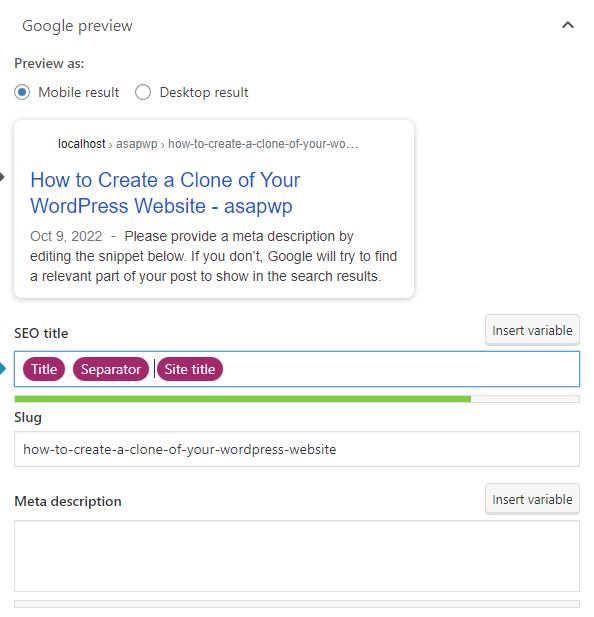
The “SEO title” field allows us to change the title that will be shown for our post in Google’s search results.
Currently, it is defaulting to using the default variables we previously set up in Yoast’s “Search Appearance” settings for posts.
You can overwrite these variables and enter in whatever you want.
Often, you might want to slightly modify the SEO title from the post title, to better encourage users to click your Google result.
Here I’ve opted to manually overwrite and add “(Definitive Guide)” at the end instead of my site title, which might lead to more clicks.
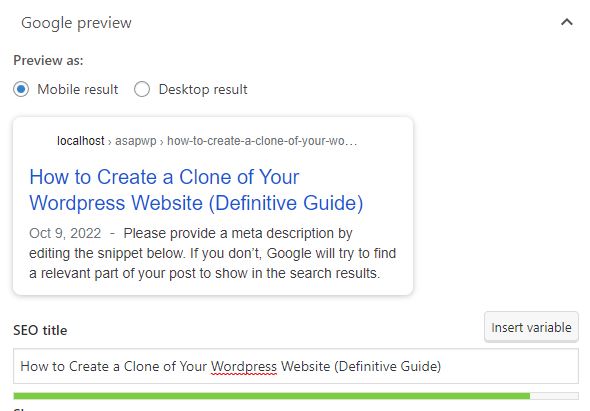
As a general rule of thumb, you want to keep your target keyword at the beginning of the title.
In this case, my target keyword is “How to Create a Clone of Your WordPress Website”.
The “Slug” field will allow you to manually change the post’s URL.
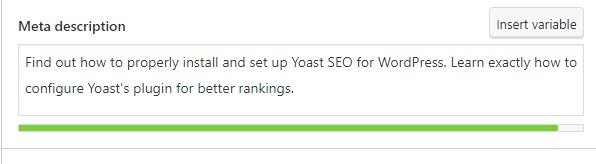
For the meta description field, rather than leaving it blank, you should craft a unique, enticing and informative description.
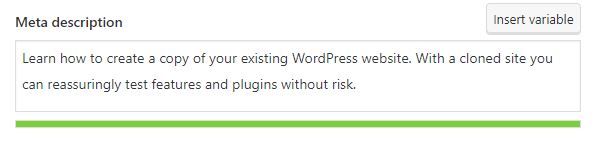
If you don’t, Google will choose one for you by selecting some part of your text, which might not make for a very good description.
SEO analysis
The “SEO analysis” sections provides a list of rule of thumb guidelines to improve the SEO of your post.

Add related keyphrase
This section is for premium users and allows you to enter in related keywords.
Track SEO performance
This feature requires a paid plan with Wincher.
It’s a service that will allow you to see the current ranking position of your post’s target keyword in Google, from within post editor.
![]()
Cornerstone Content
You can mark this post/page as being “cornerstone content”.
Basically, this means you are marking this post as being one of your most important and informative articles on your website.
Cornerstone content might delve into everything you need to know about a topic, where other posts are shorter, more specific or less encompassing.
Usually, you will rank this style of posts/pages for harder/better keywords, because of their more authoritative nature.
Cornerstone content can also go by the term “pillar posts/content”.
Advanced
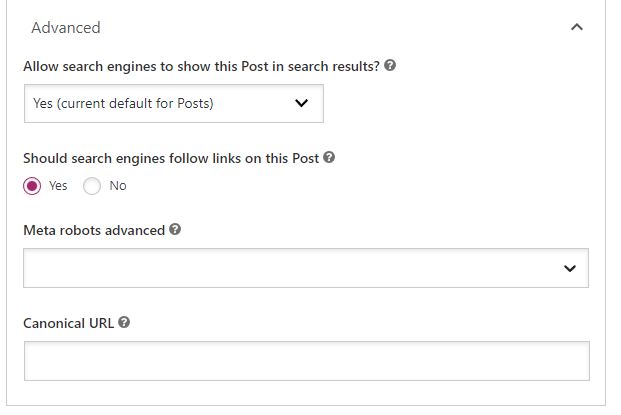
You shouldn’t need to use this section, but if you do here is what these options mean:
For “Allow search engines to show this Post in search results”, you can tell search engines to not list this specific post in their index (no-index).
For meta robots advanced:
- No image index: disallow search engines from crawling images on this post
- No archive: prevent the search engine from showing a cached copy of this post
- No snippet: prevents the search engines from showing a snippet of this page in the search results as well as from caching the post
For Canonical field, if you have duplicates of the same post/content, you can enter in the URL to the original piece of content.
This informs search engines exactly which post/page is the original source of this content.
Readability
We can move onto the “Readability” tab at the top of the Yoast settings.
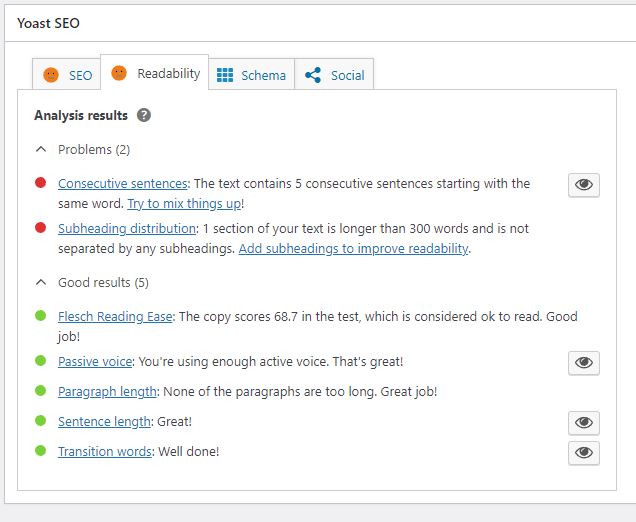
Here you can see more general guidelines for improving the readability of your content.
Schema
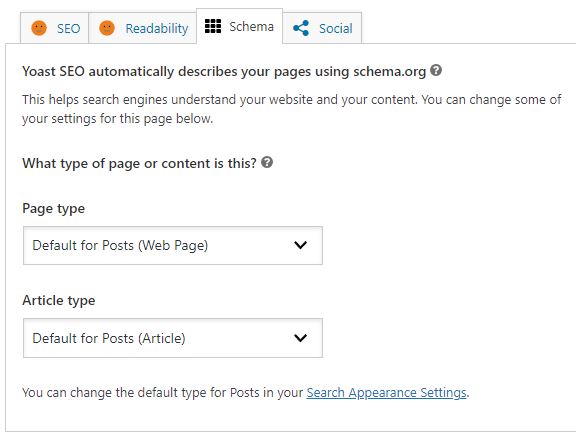
Structured data is a way to describe your website and webpages, and their type of content, better to search engines.
You can typically just leave these settings alone, as Yoast will automatically describe your posts/pages.
Social
The social tab allows you to add an image and customize the title and description, which will appear when someone shares this post.
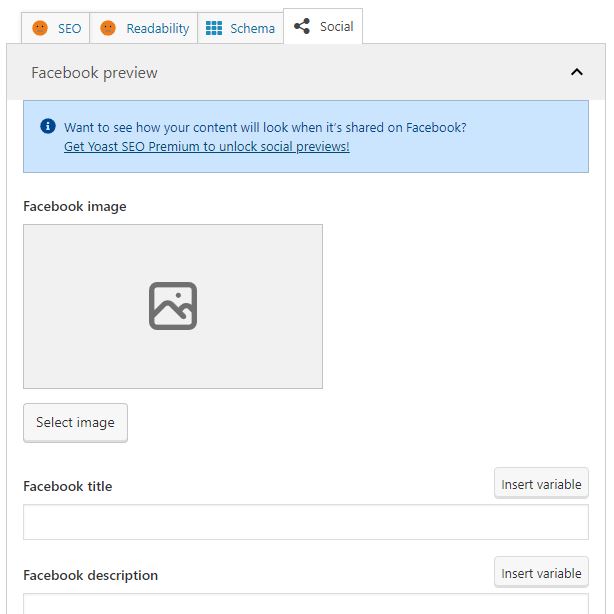
If you’re a premium user, you can see a preview of how it will look.
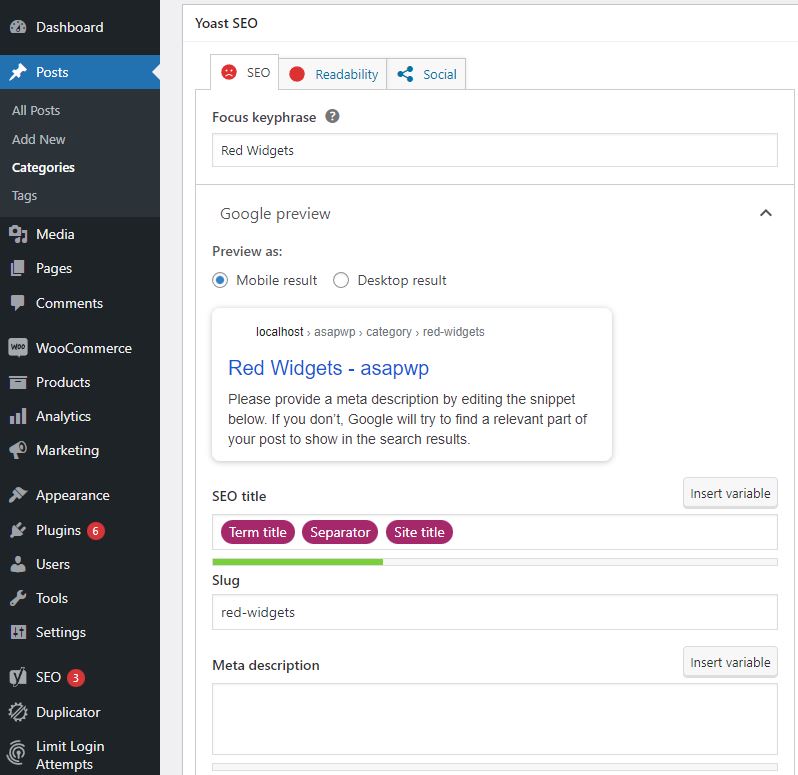
Step 2: Optimizing Taxonomies for SEO
Just like with post/pages, the same Yoast features are available for Categories.
Simply go to Post->Categories and you will see the Yoast section near the bottom.
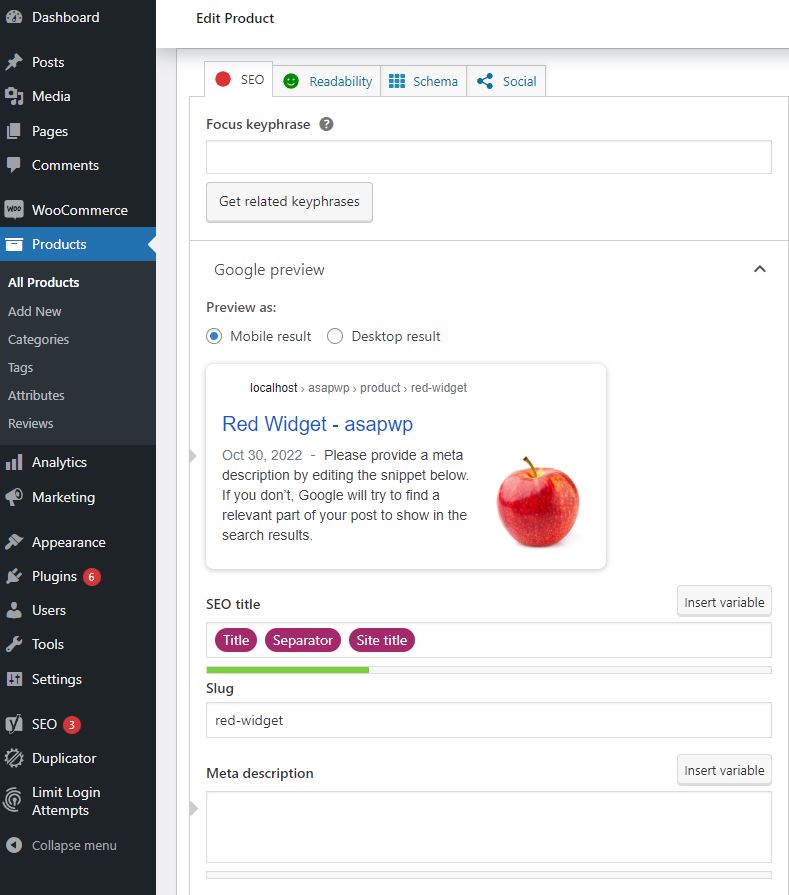
Step 3: Optimizing Products with Yoast SEO
Yoast SEO features are also available for WooCommerce product pages.
Simply go to Products->Add New and you will see the Yoast section near the bottom.
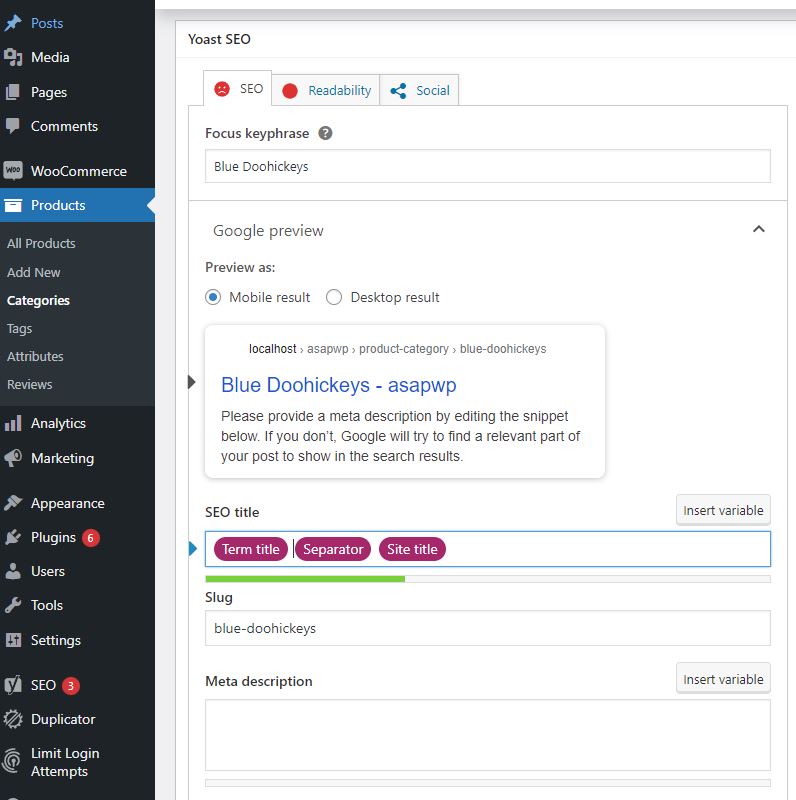
Step 4: Optimizing Product Categories with Yoast SEO
WooCommerce product category pages can also be optimized with Yoast.
Go to WooCommerce->Categories then add a new category.
Once you done that, click on the category to be taken to the product category editor and you will see the Yoast section near the bottom.
Conclusion
Yoast SEO is the most popular SEO plugin on the market.
It has grown over the years, now containing a large assortment of useful features that helps you to optimize and structure your website for better search engine optimization.
The process of setting up Yoast is fairly straightforward.
However, it’s important to configure Yoast correctly in order to ensure that your website is optimized properly.